Self-Host Zoraxy: An Alternative to Nginx Proxy Manager
A while ago, I saw a new reverse proxy project—Zoraxy. After a brief trial, it felt similar to Nginx Proxy Manager.
This project also supports docker deployment, and adding reverse proxy rules is done visually in a backend management interface.
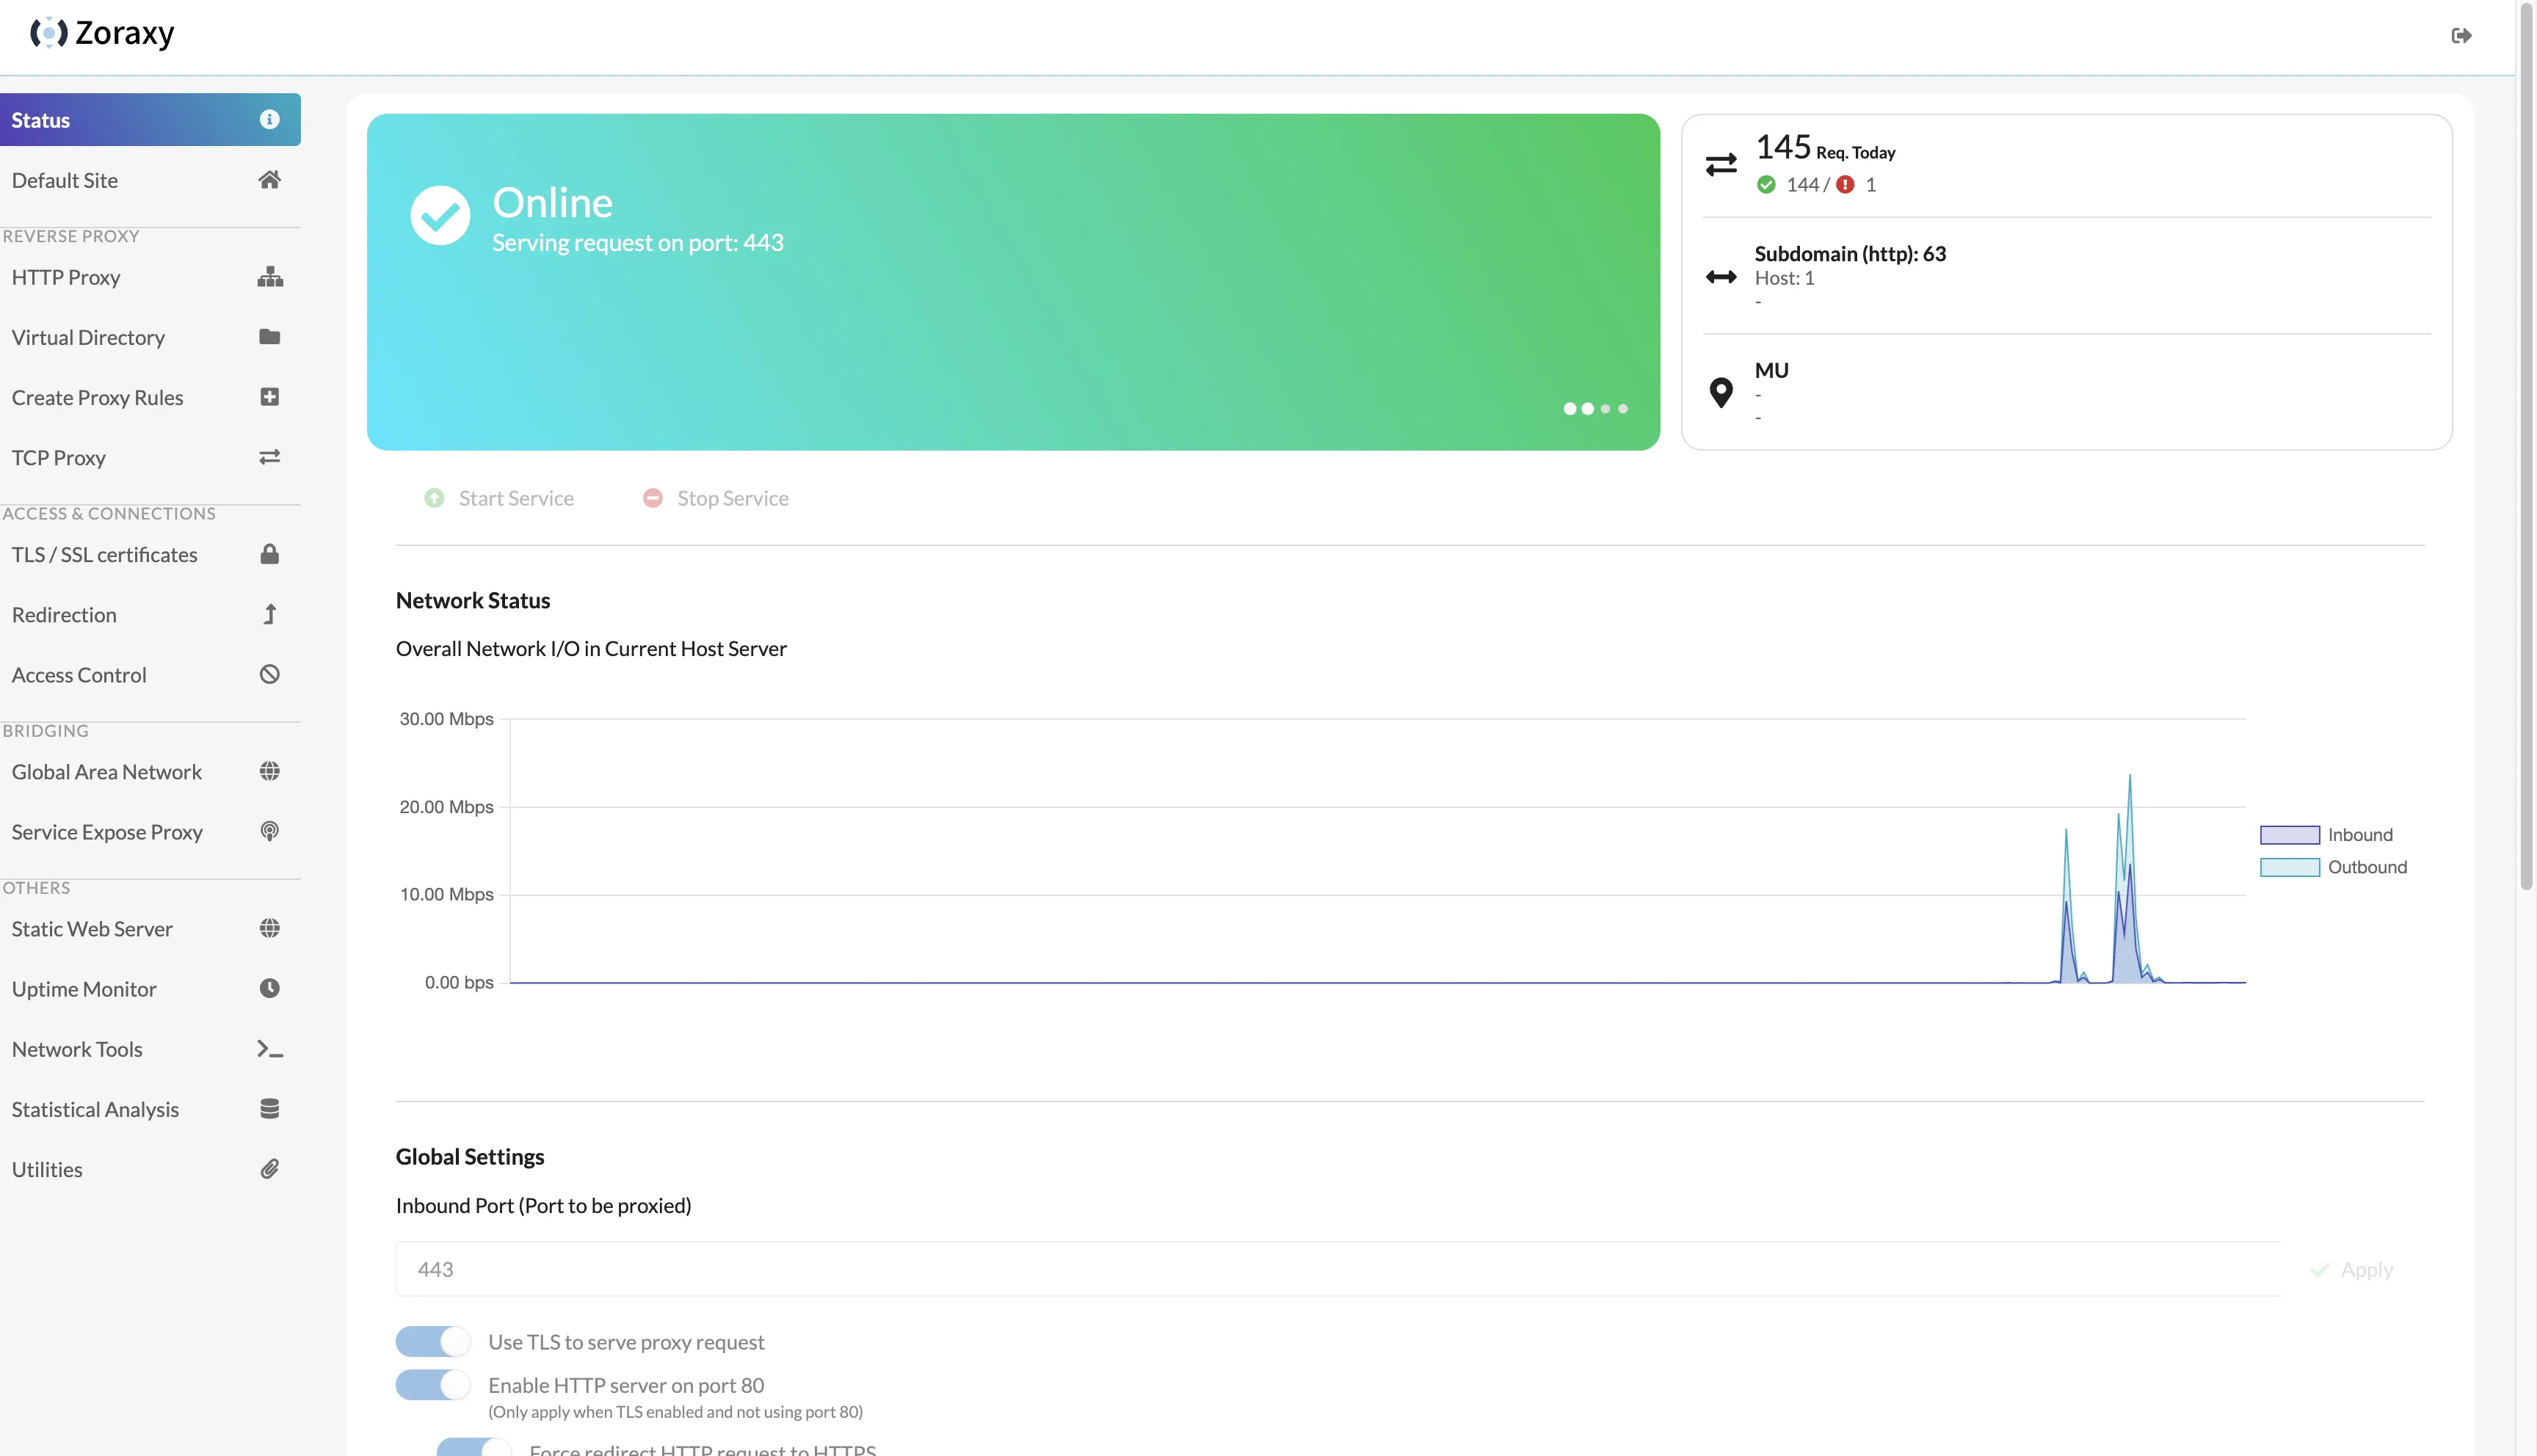
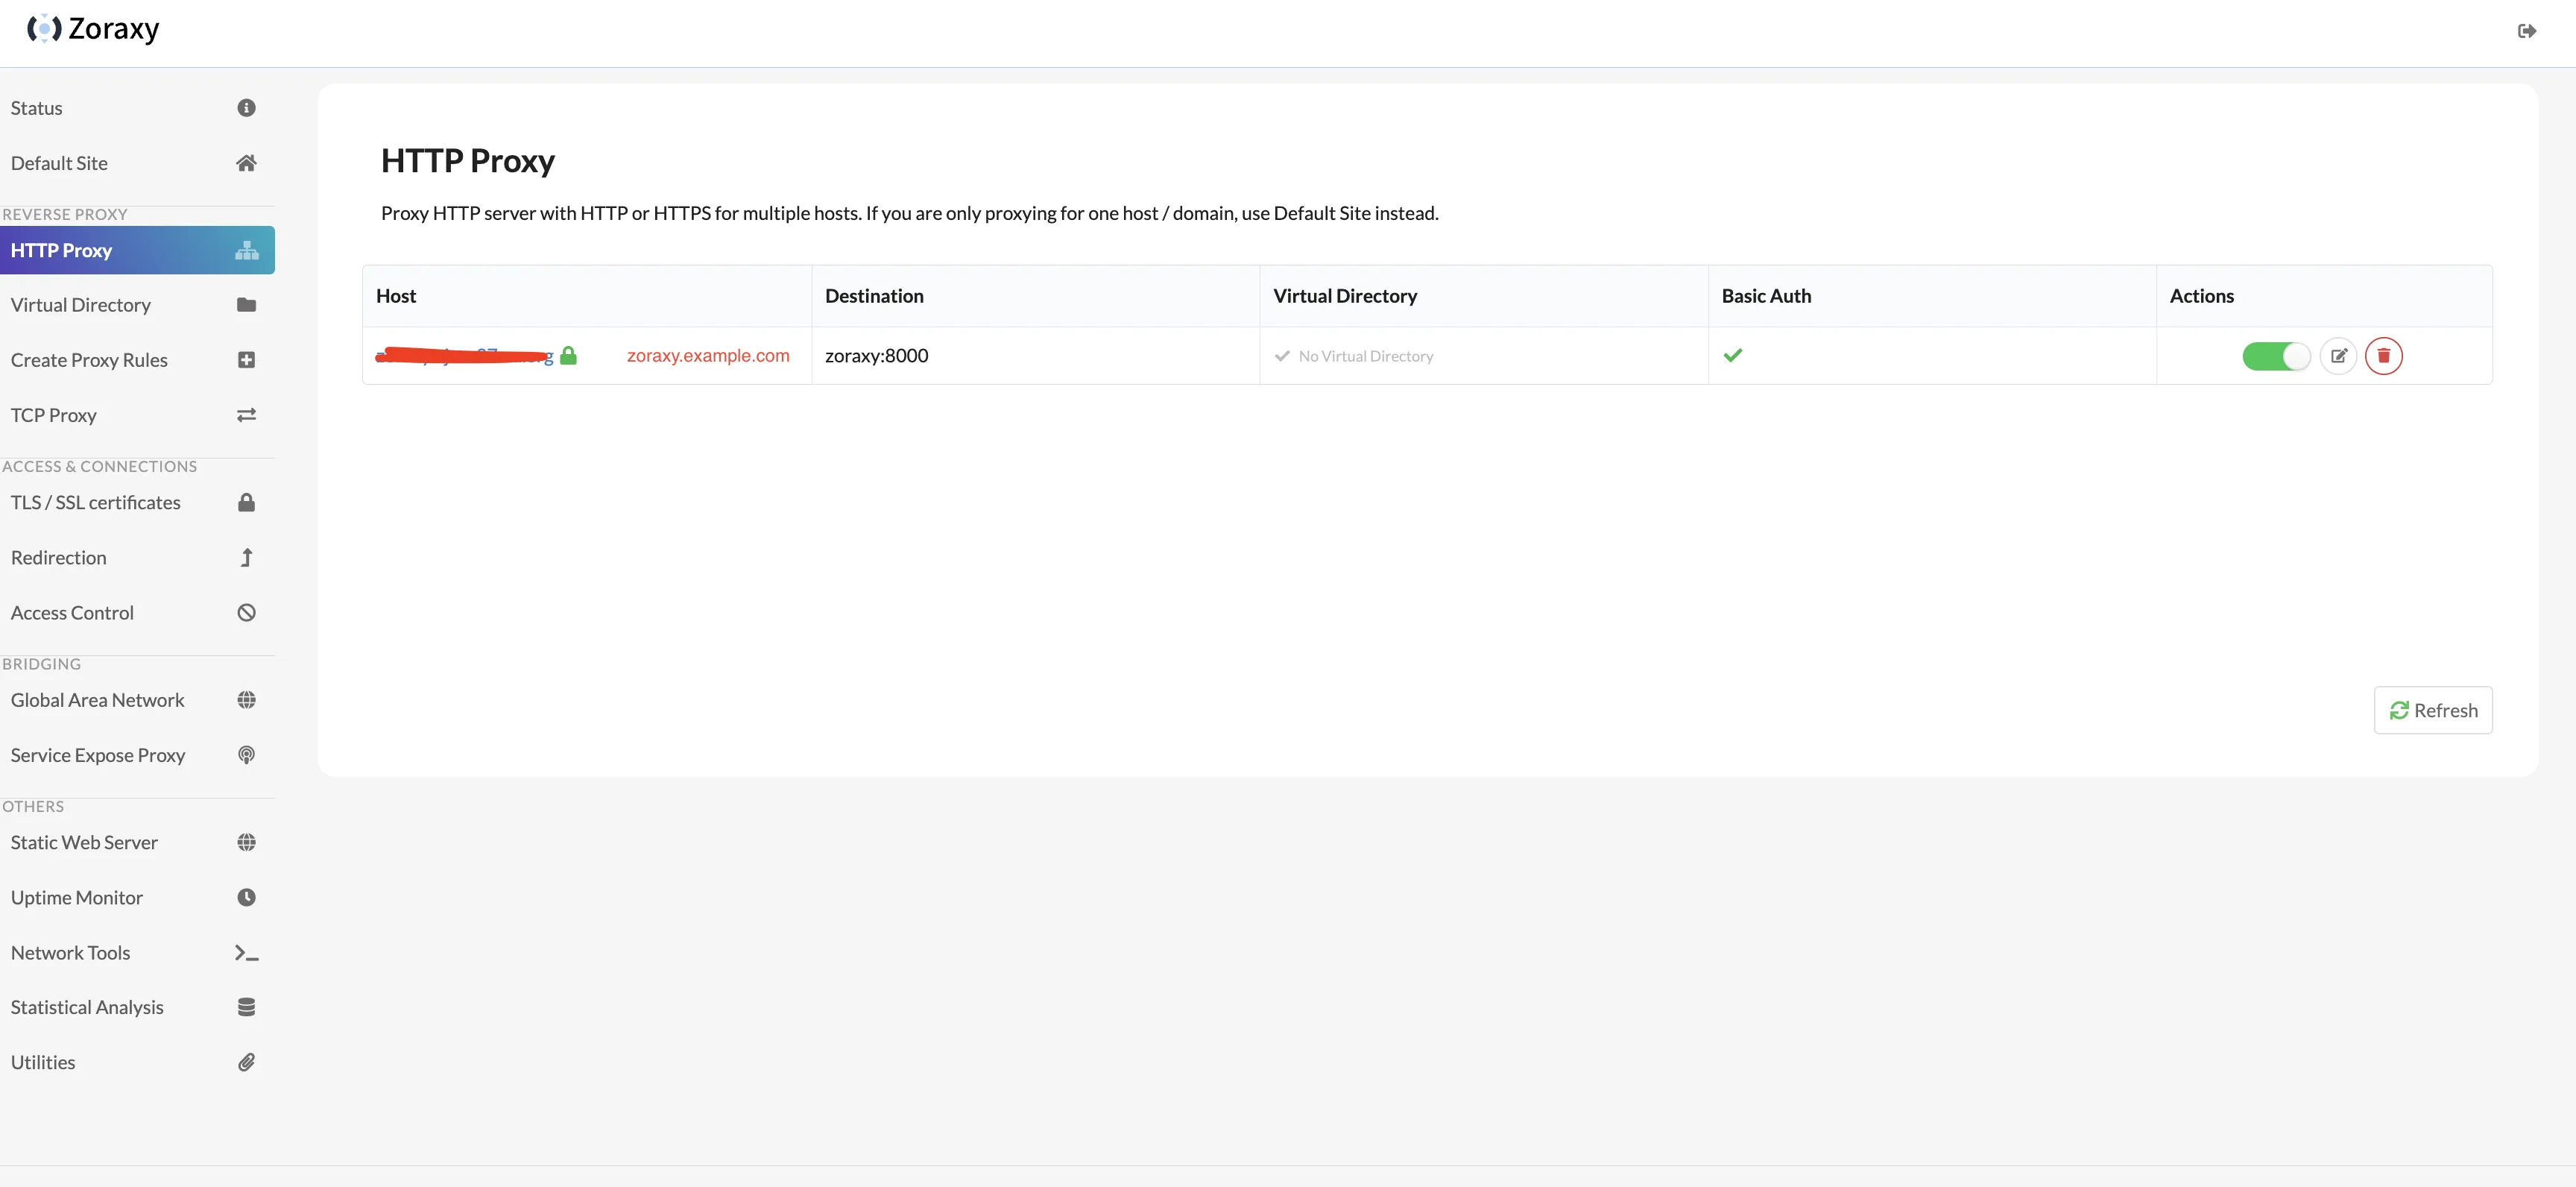
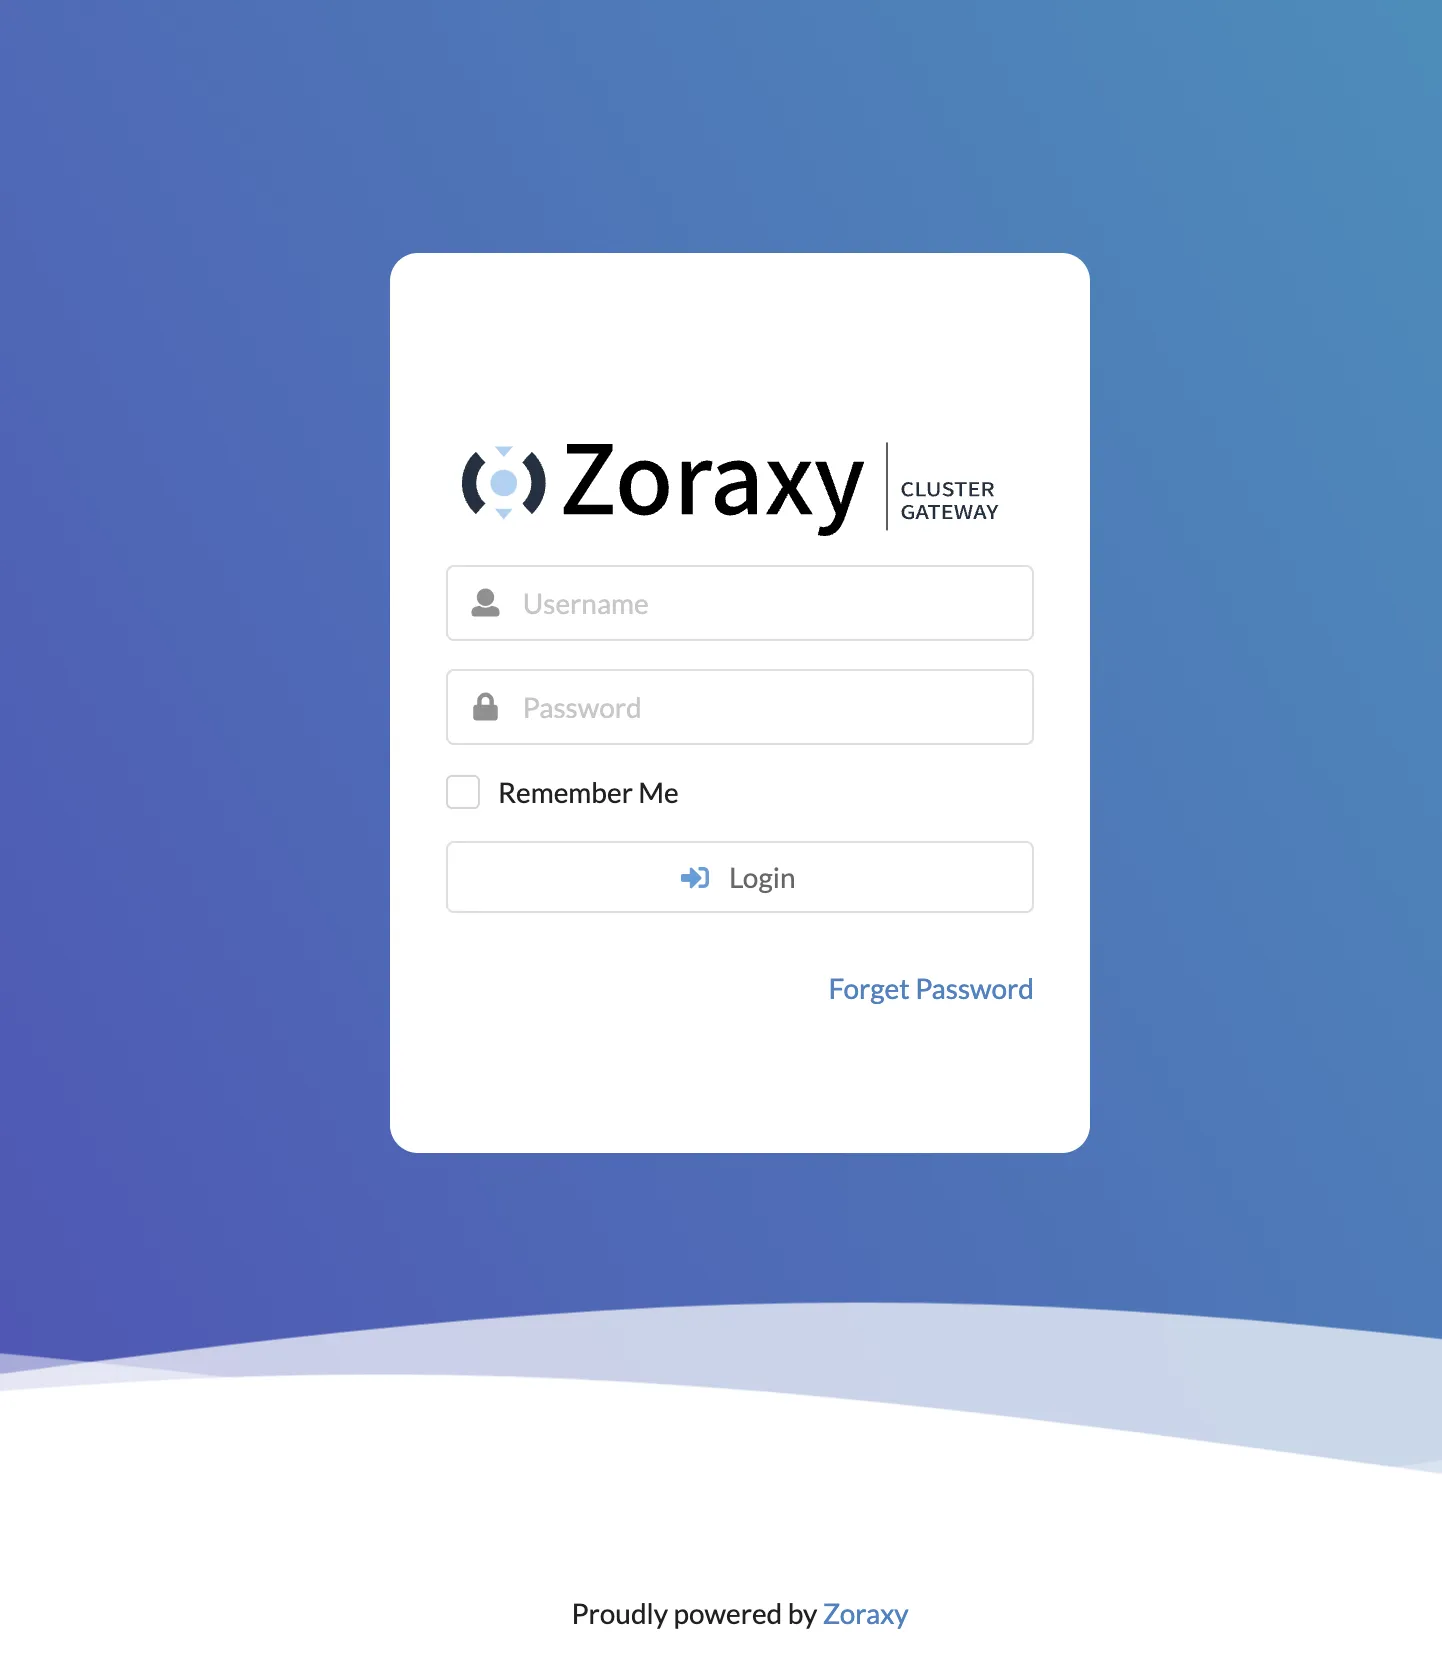
Zoraxy deployment result looks like this:
1. Self-Hosting Steps
1.1. Prerequisites
Install docker and docker compose.
If not installed, use a one-click script:
|
|
1.2. Self-Host Zoraxy
|
|
Add the following content:
|
|
Let Claude3 briefly explain the above configuration.
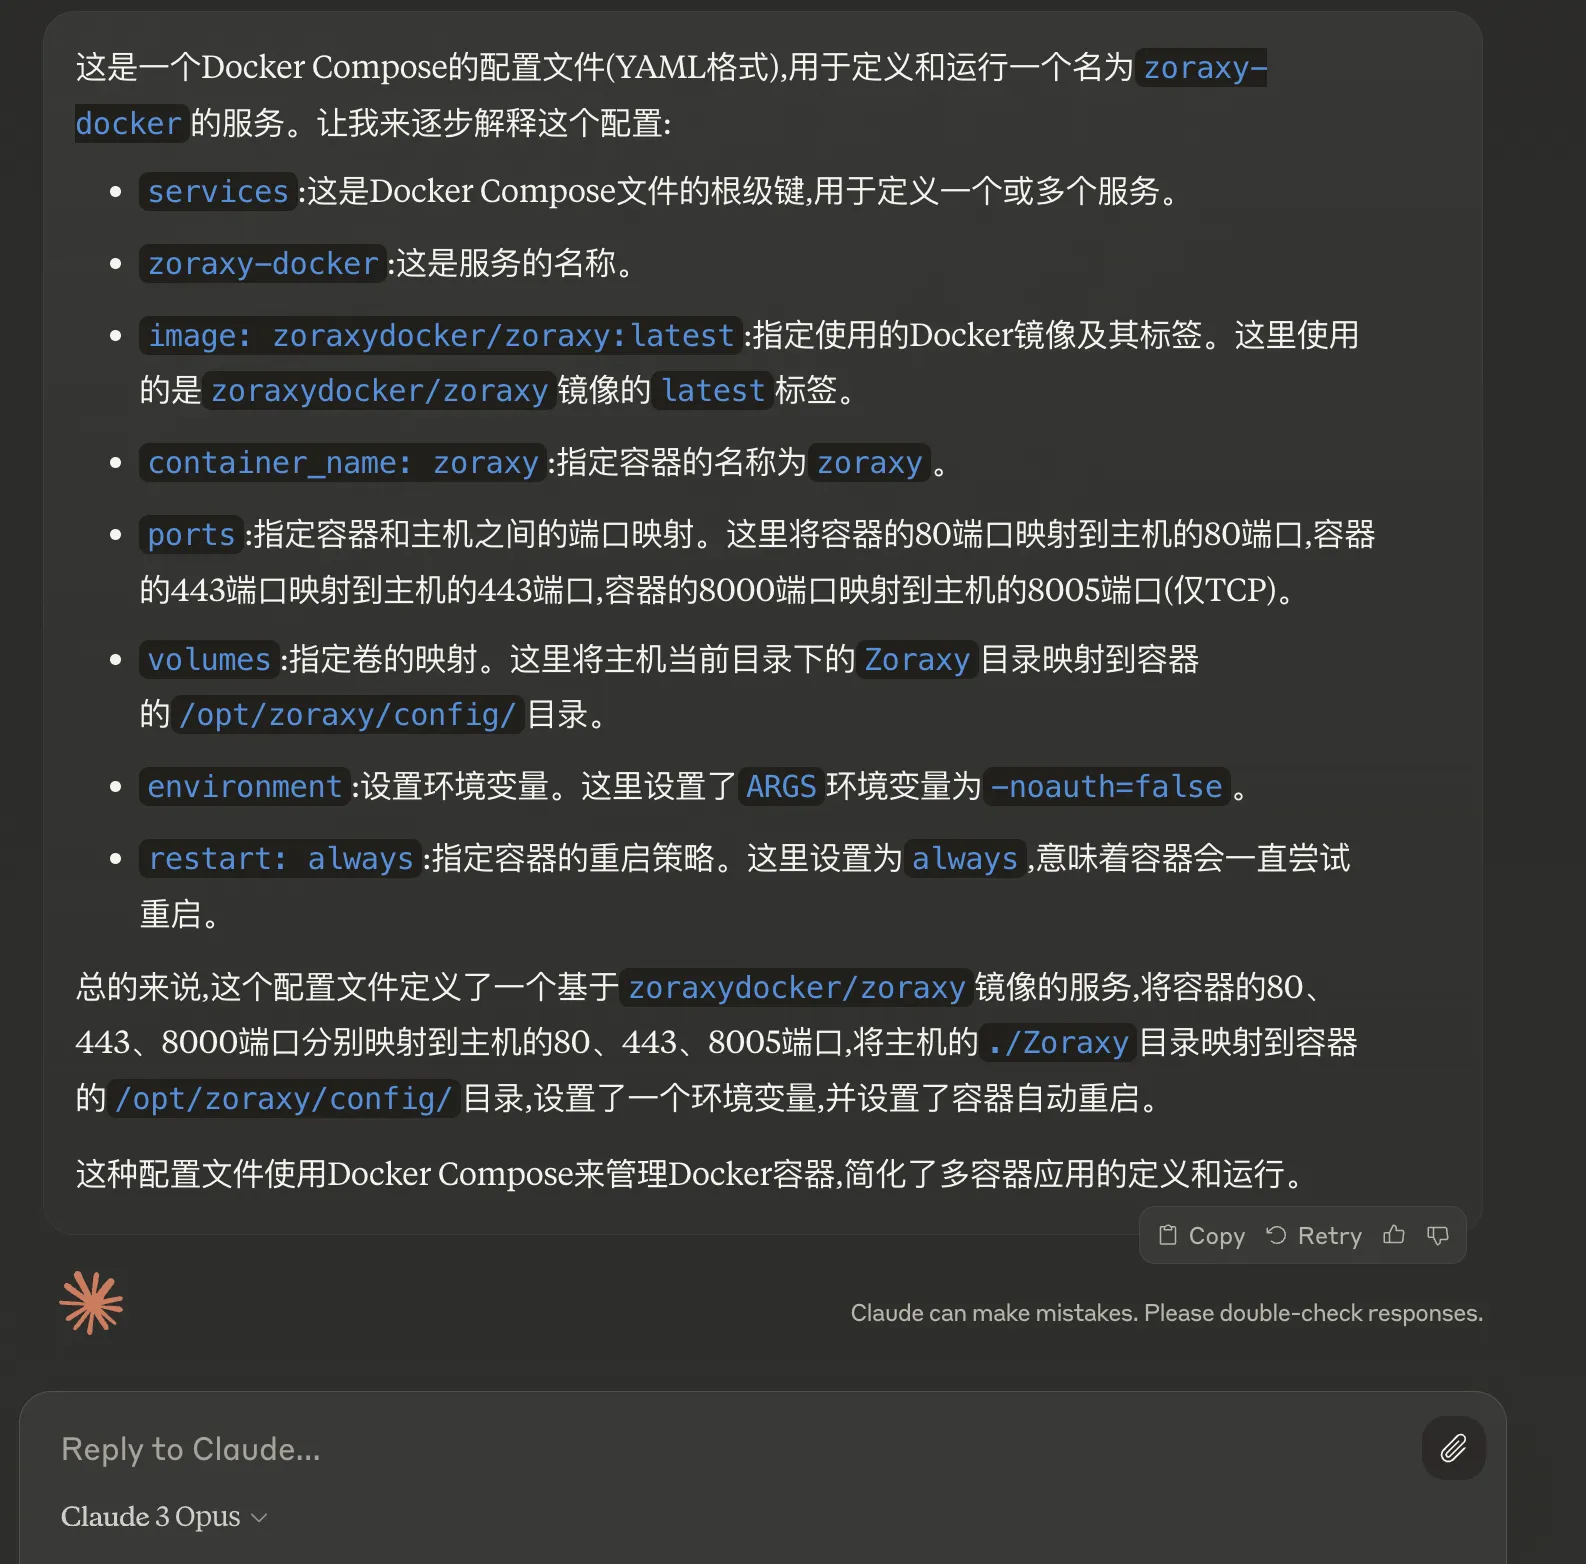
Initially enable container port 8000 mapping to host port 8005. After configuring domain access to zoraxy backend, you can remove this port mapping.
For more zoraxy docker configuration info, see: zoraxy/docker.
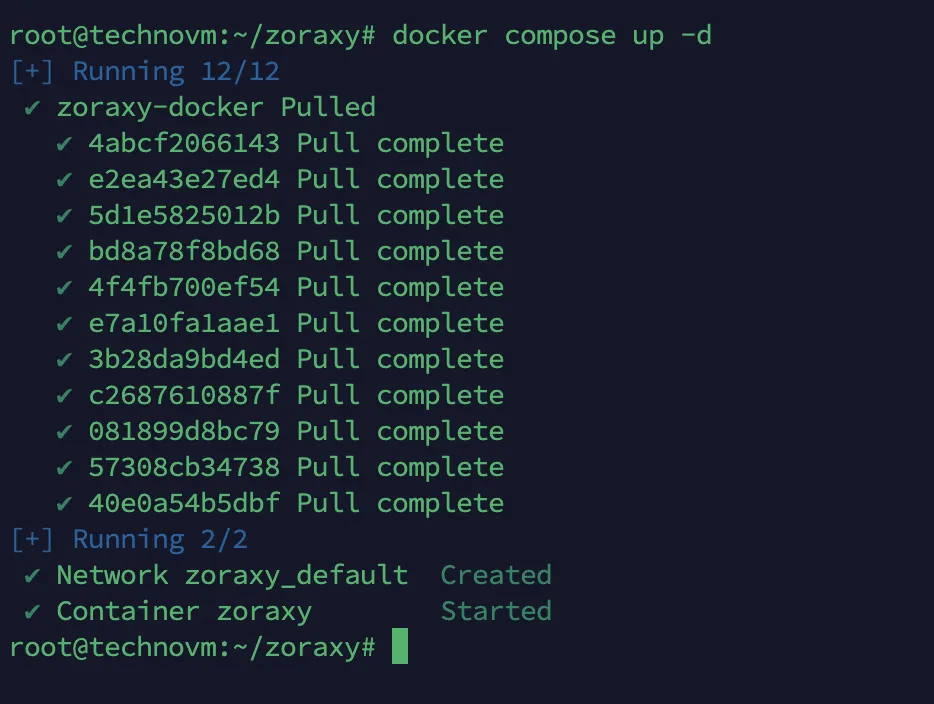
Then execute the following command to start and run the container in background.
|
|
Now enter http://your_vps_ip_address:8005 in browser address bar to access zoraxy backend. [Note: if VPS has firewall enabled, temporarily allow port 8005 first. After setting up domain access for zoraxy backend, remove this port allowance]
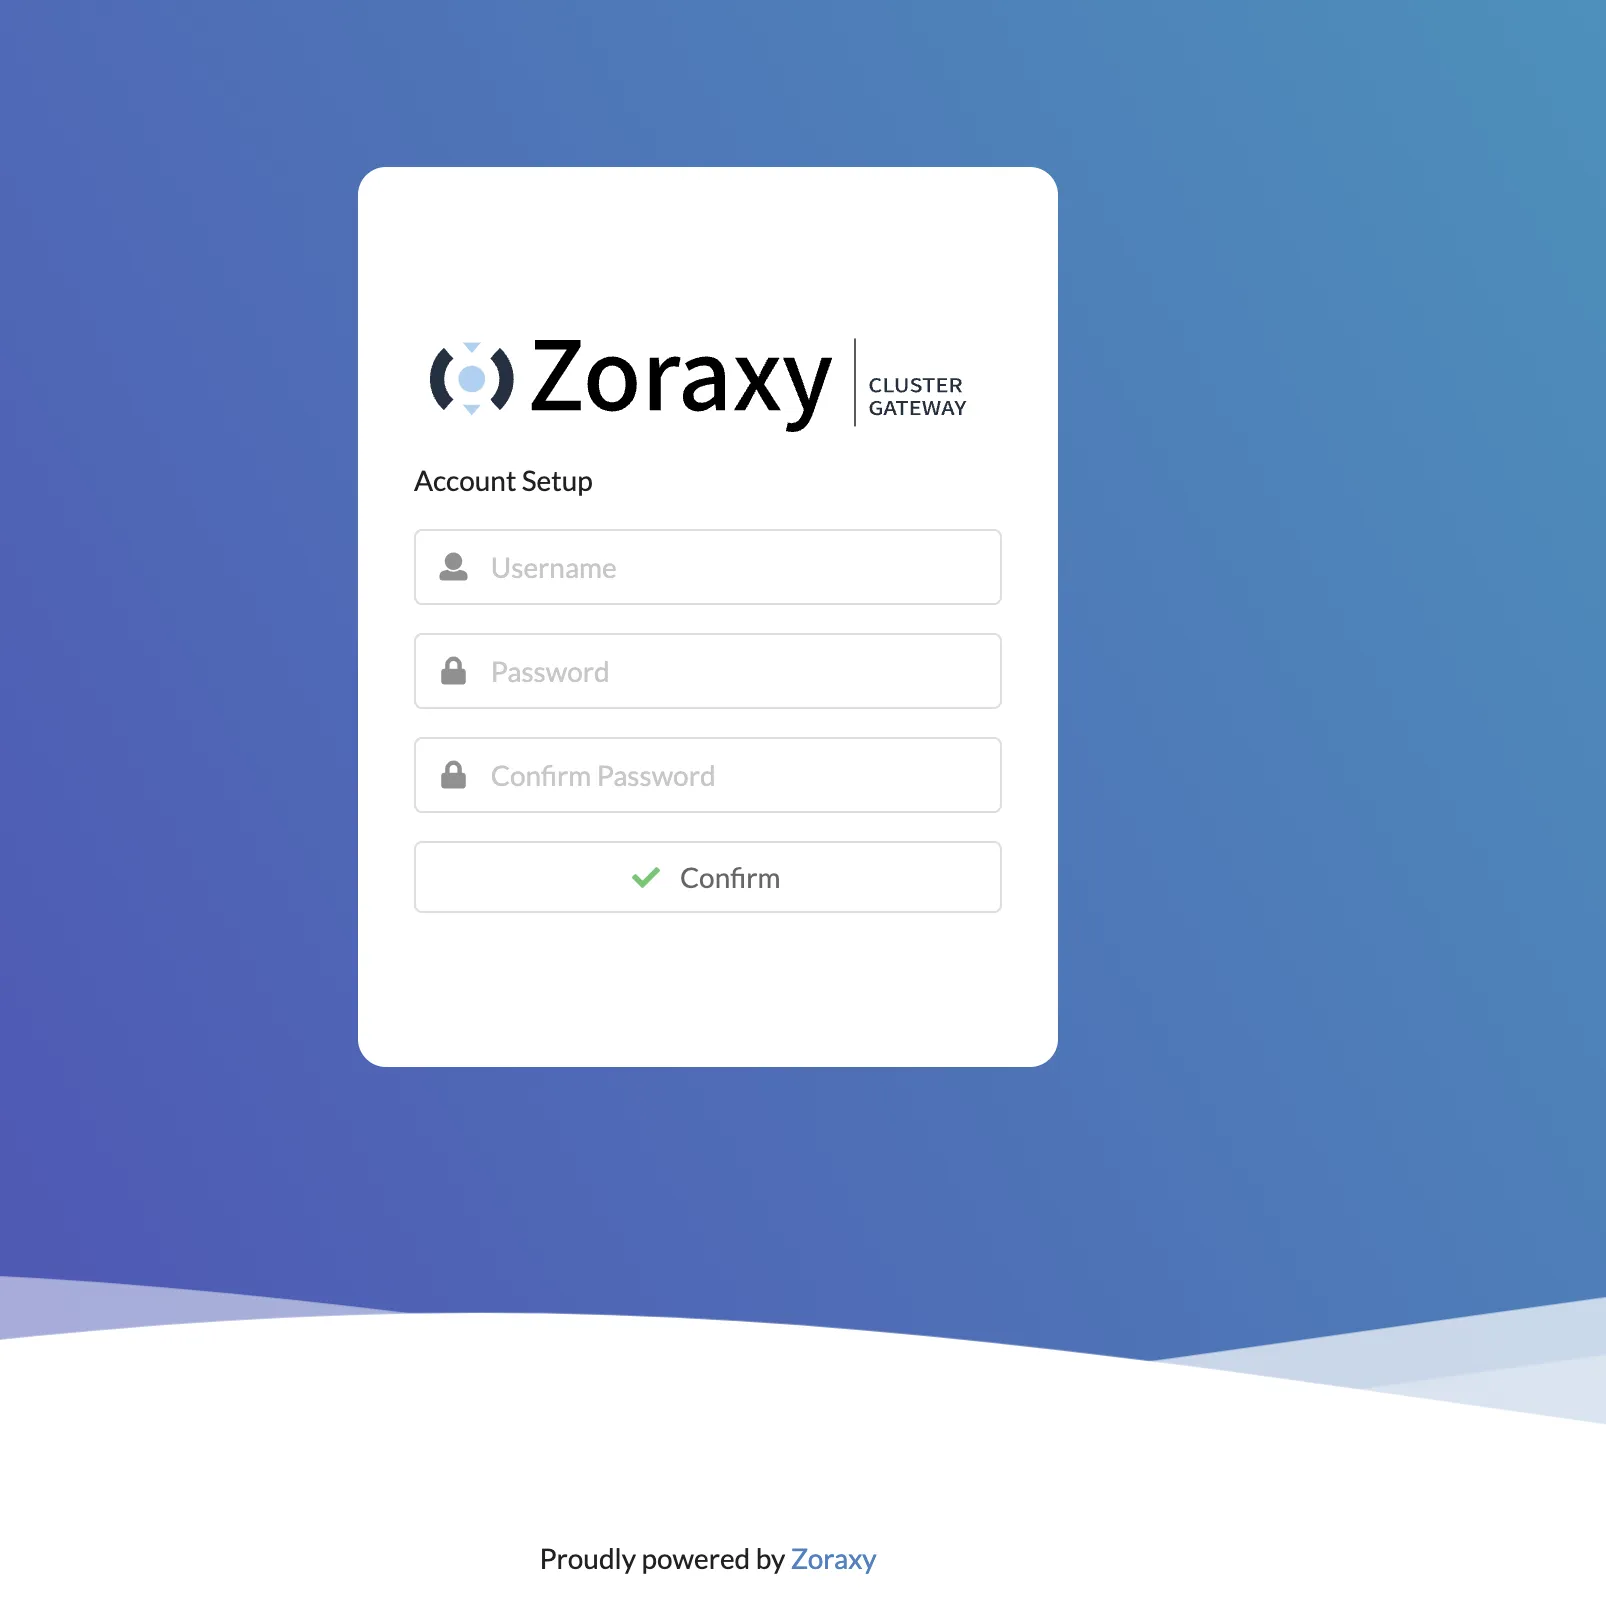
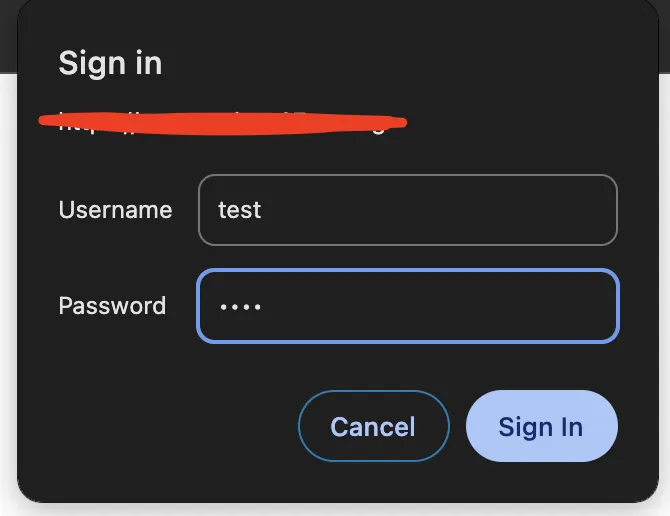
Enter username and password to create account.
Then enter the username/password just created to login to zoraxy backend.
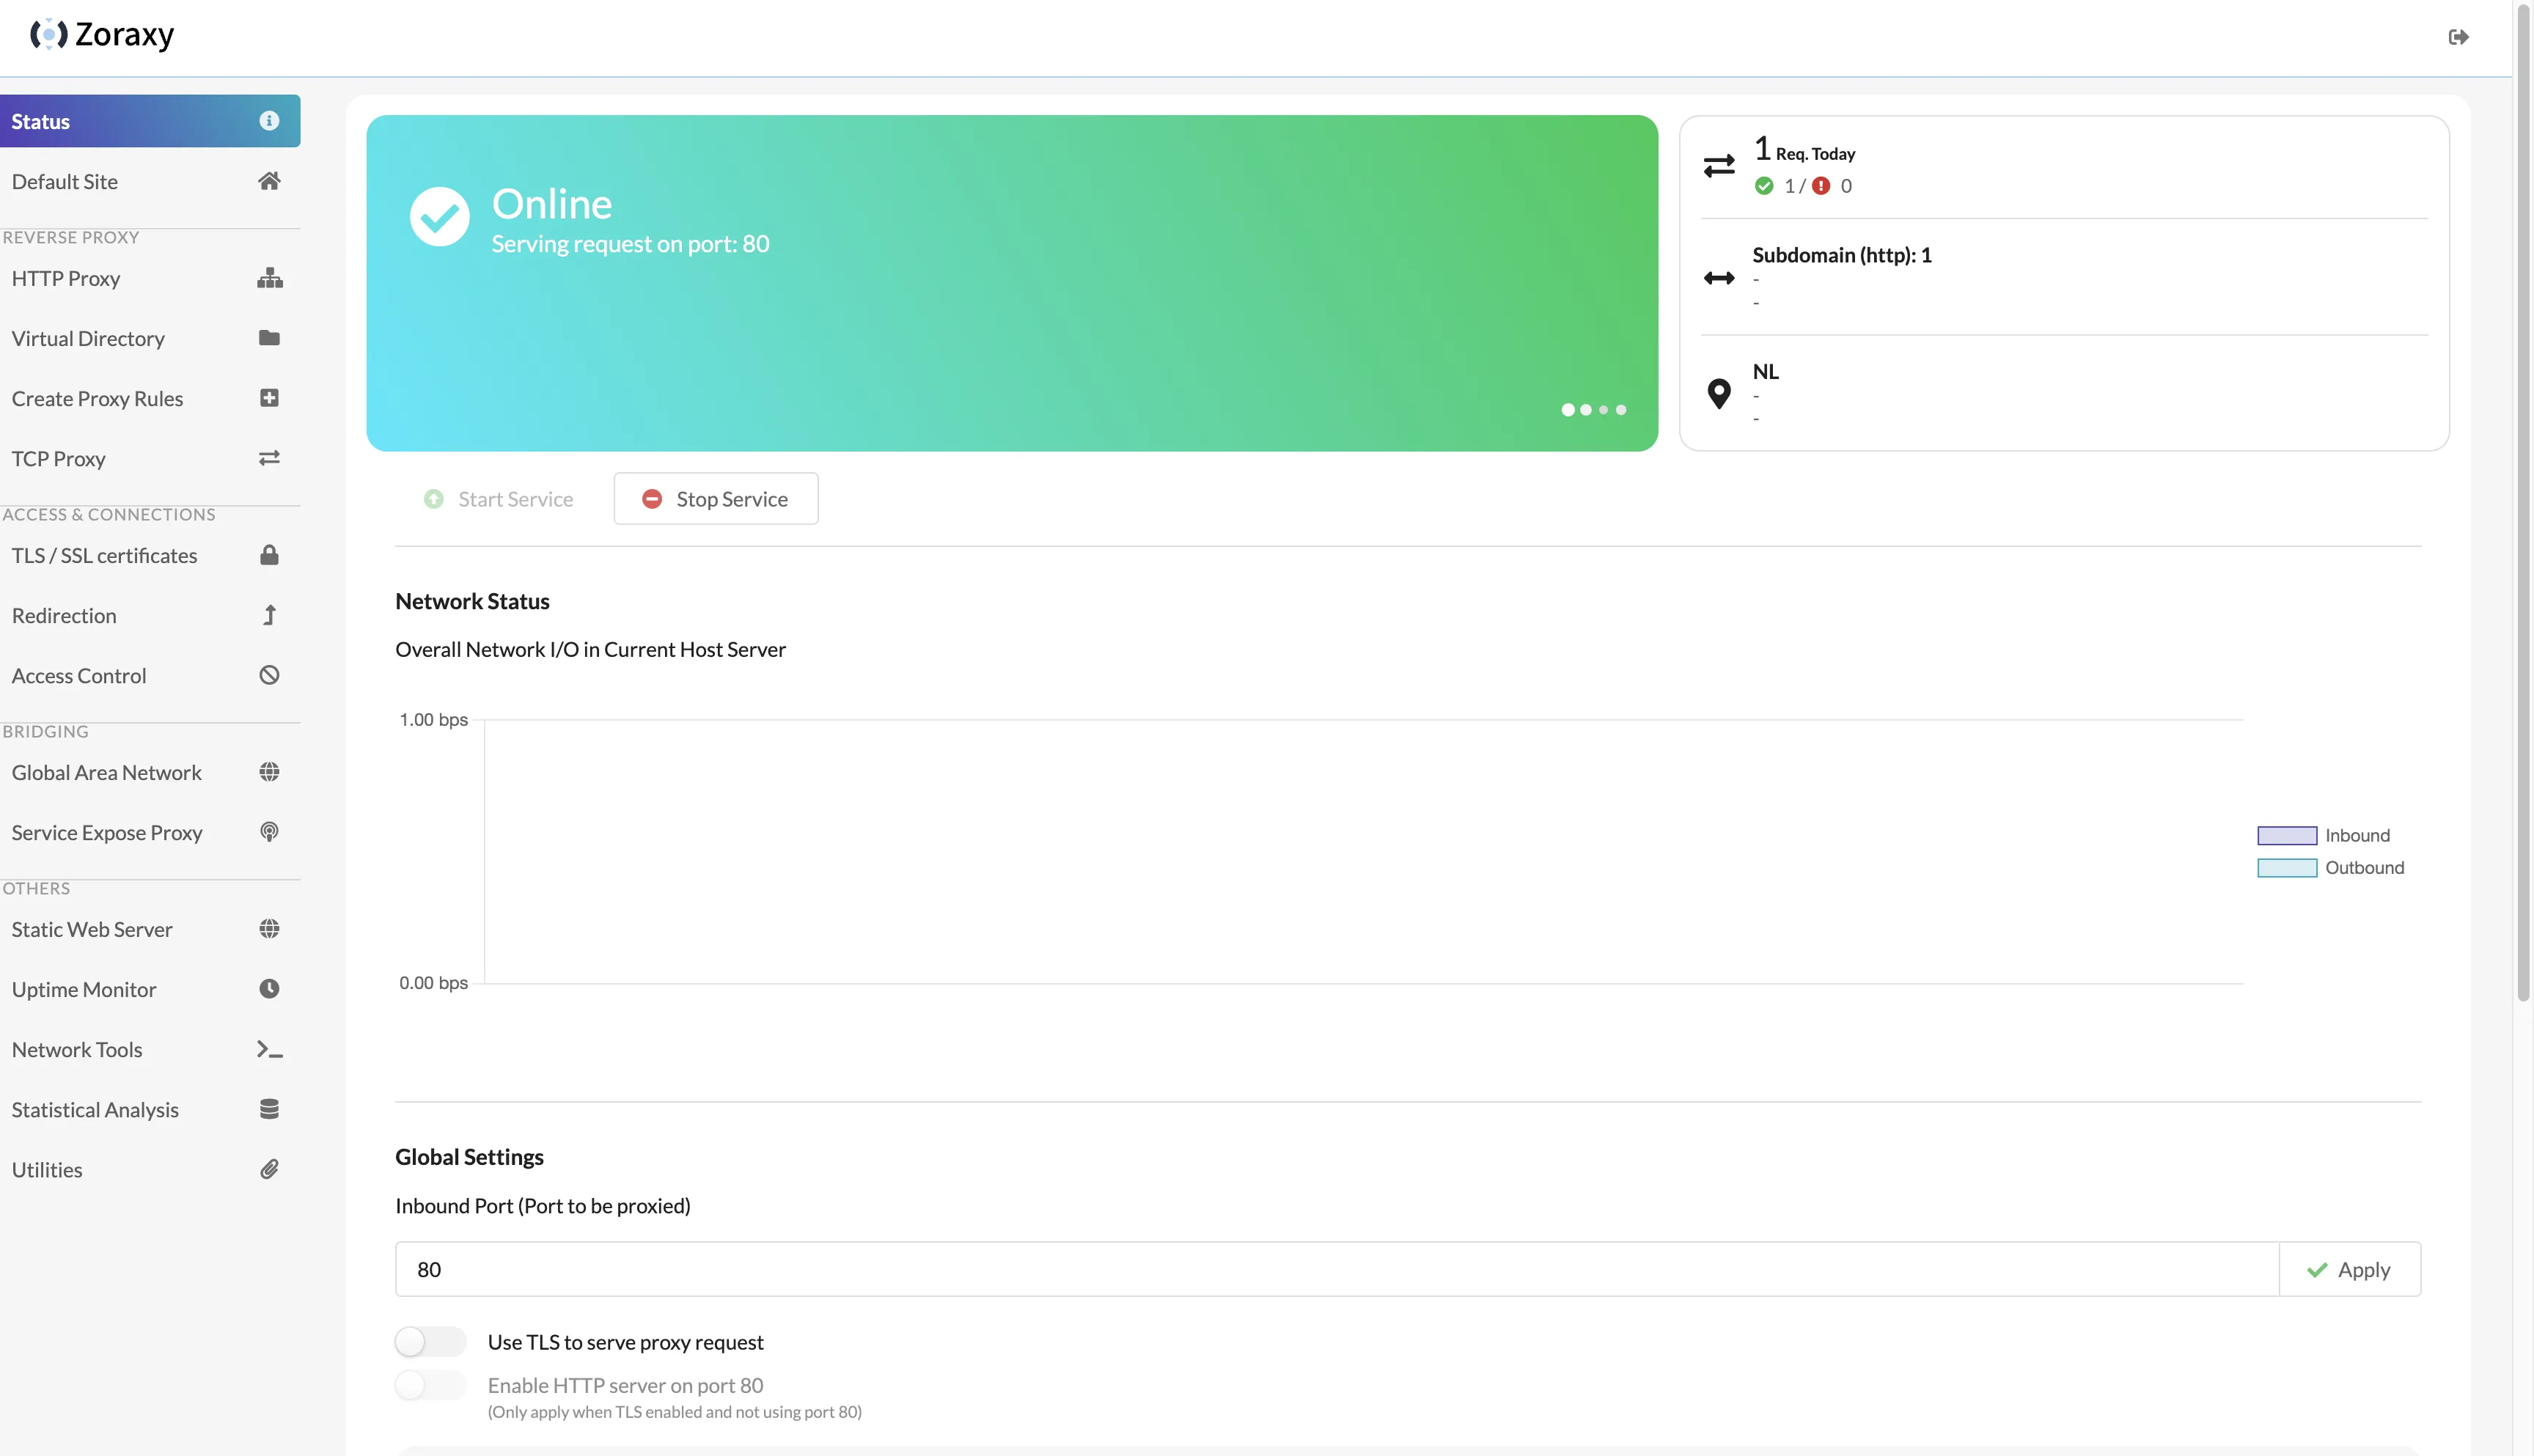
Successfully entered zoraxy backend.
1.3. Zoraxy Configuration
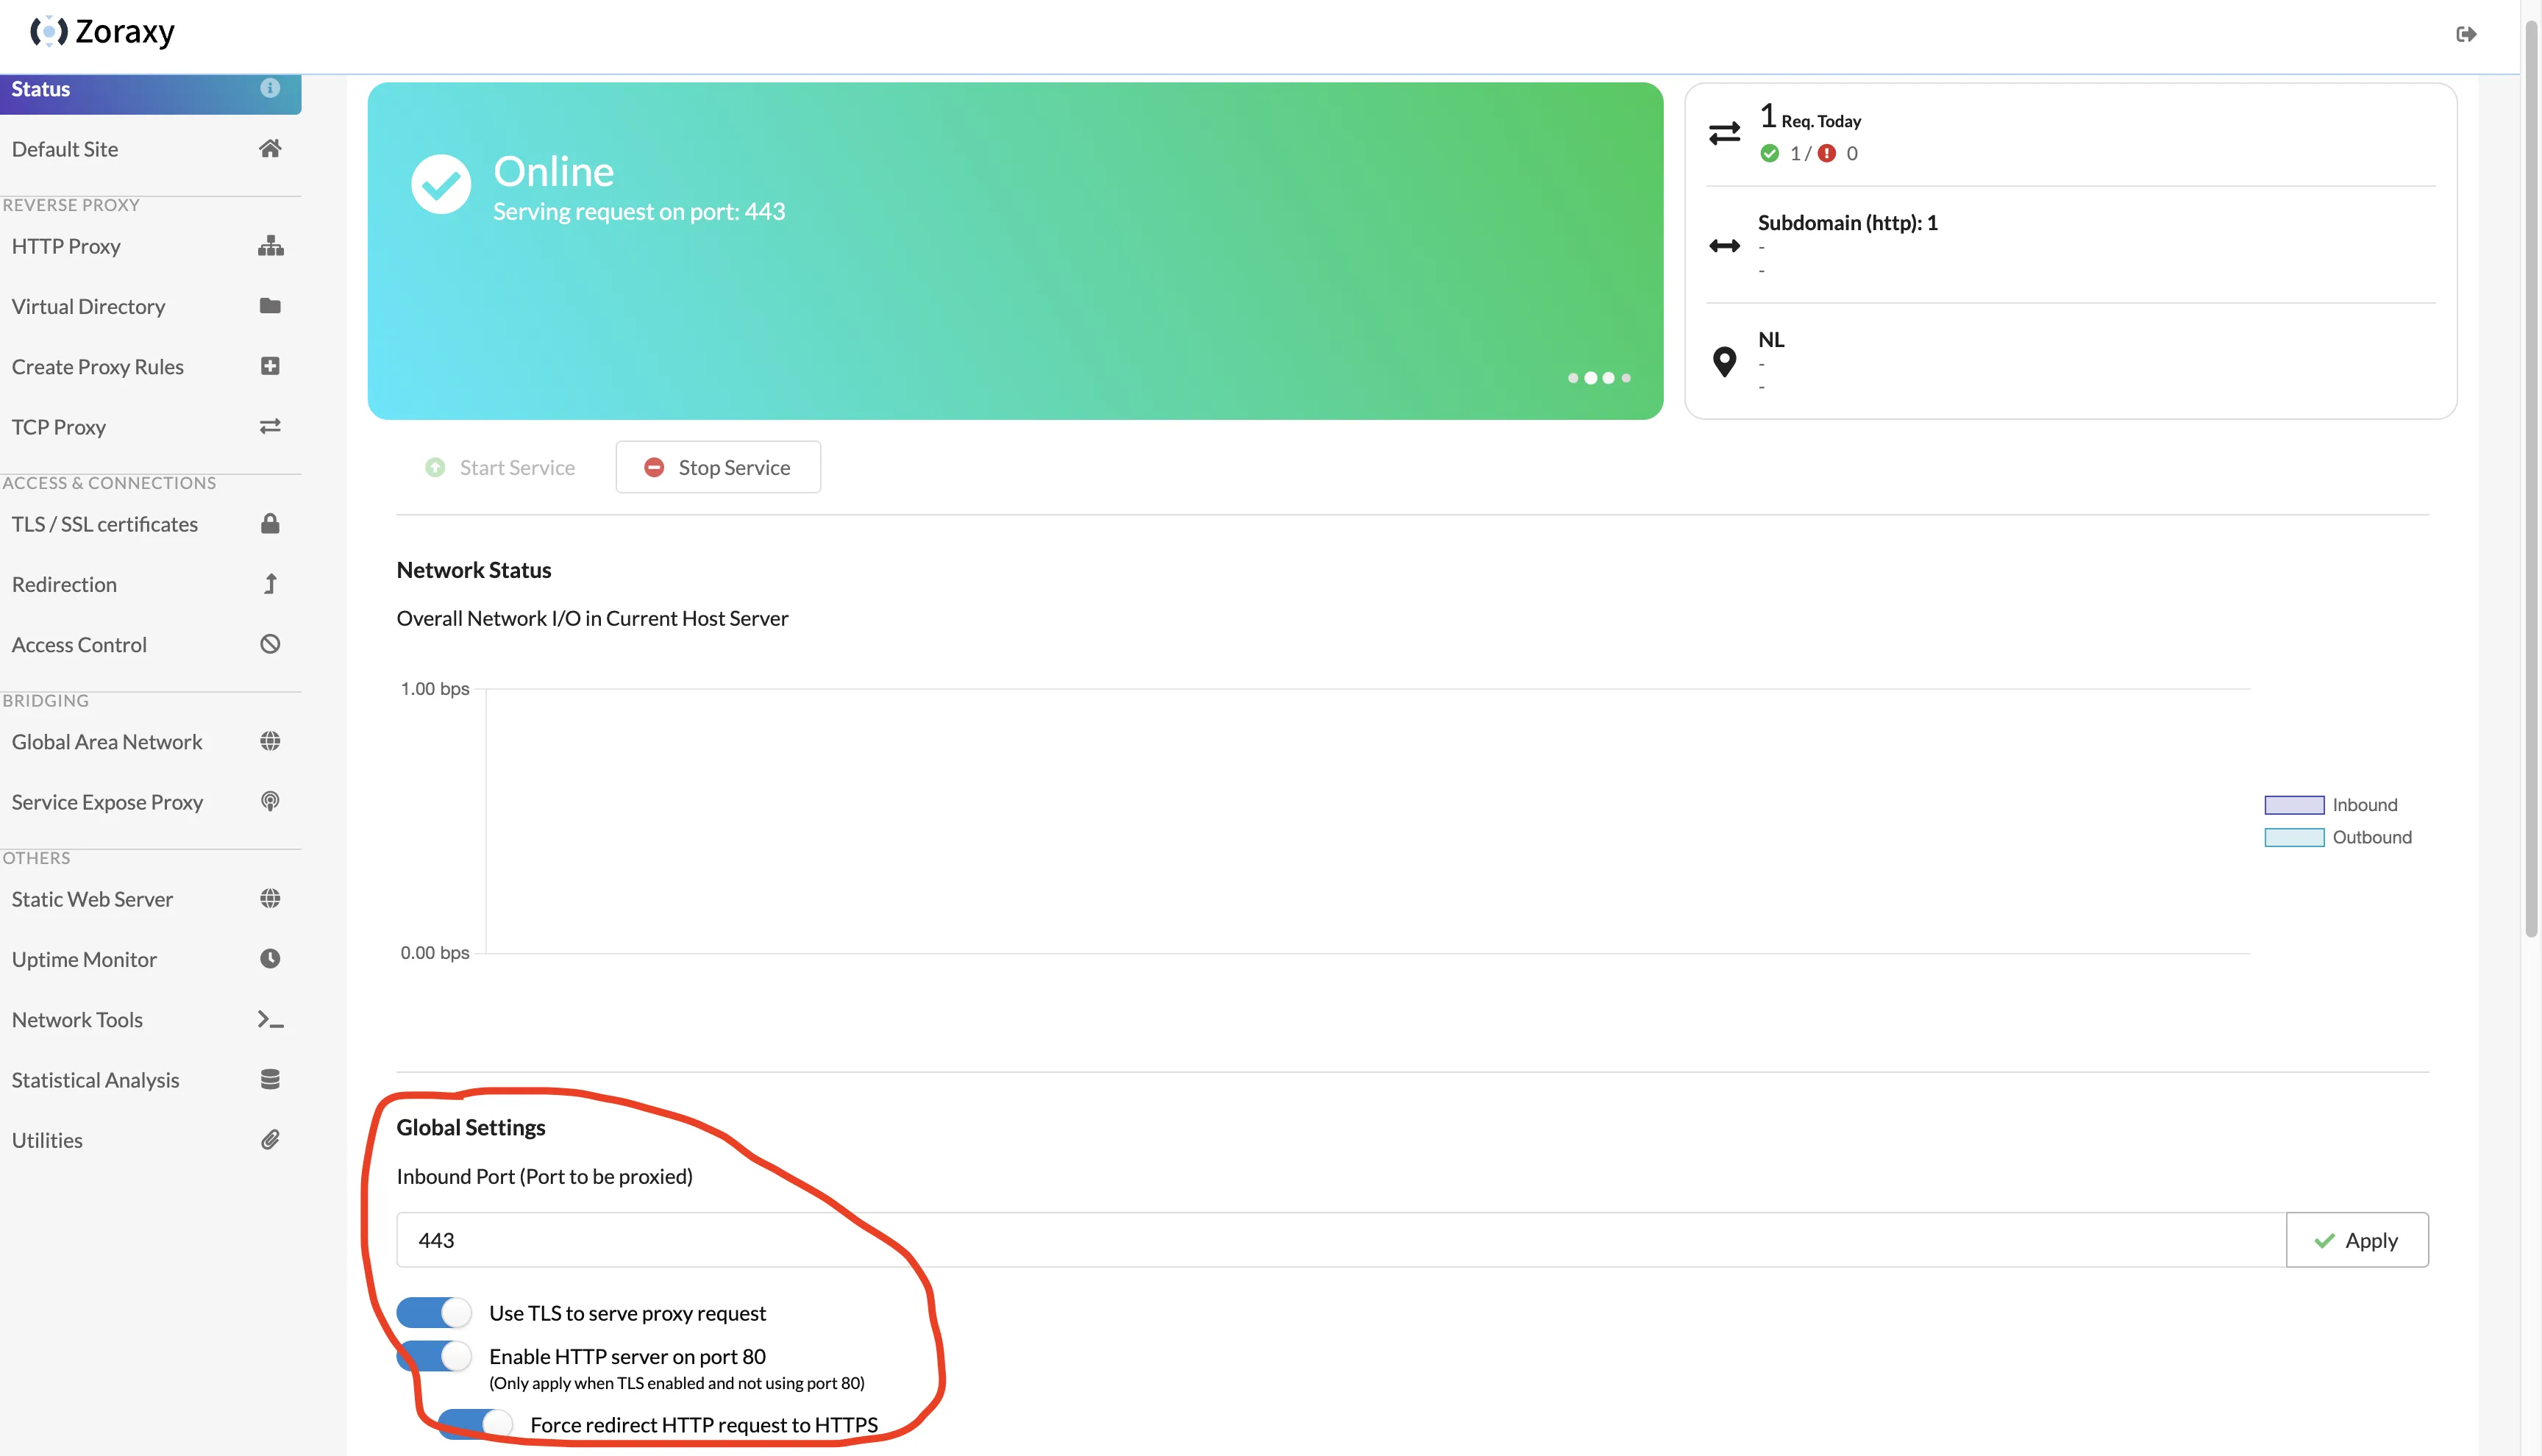
In the Status page of the backend, modify the inbound port in Global Settings to 443, and check all the options below:
- Use TLS to serve proxy request
- Enable HTTP server on port 80 (Only apply when TLS enabled and not using port 80)
- Force redirect HTTP request to HTTPS
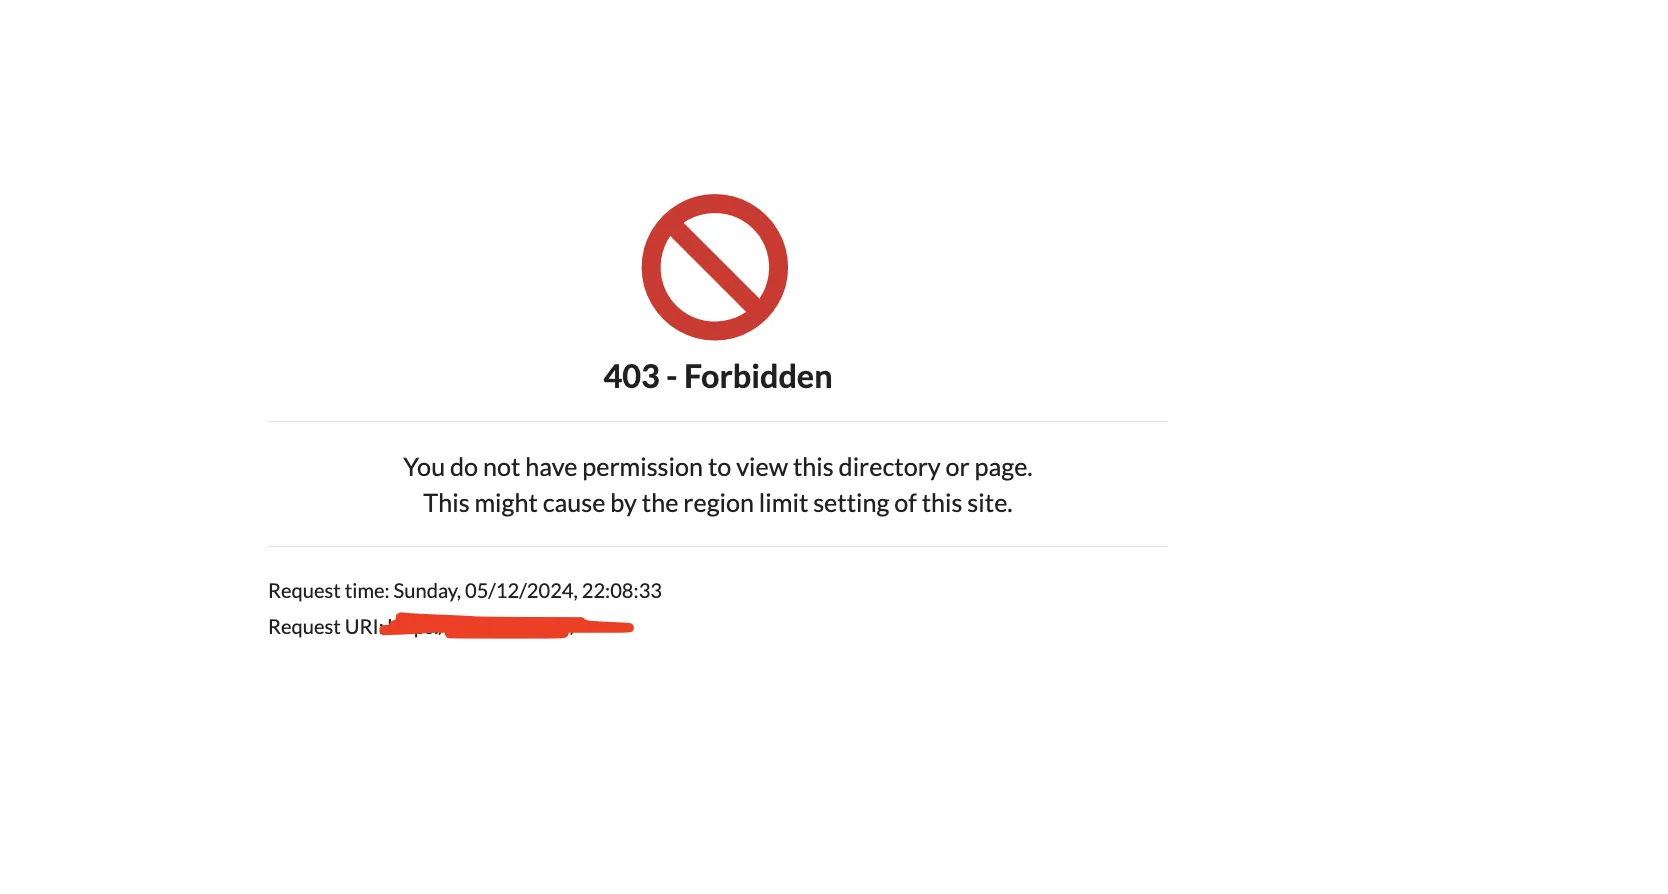
Leave the Default Site page unchanged—when encountering unknown hostname, let zoraxy use built-in static page to handle requests.
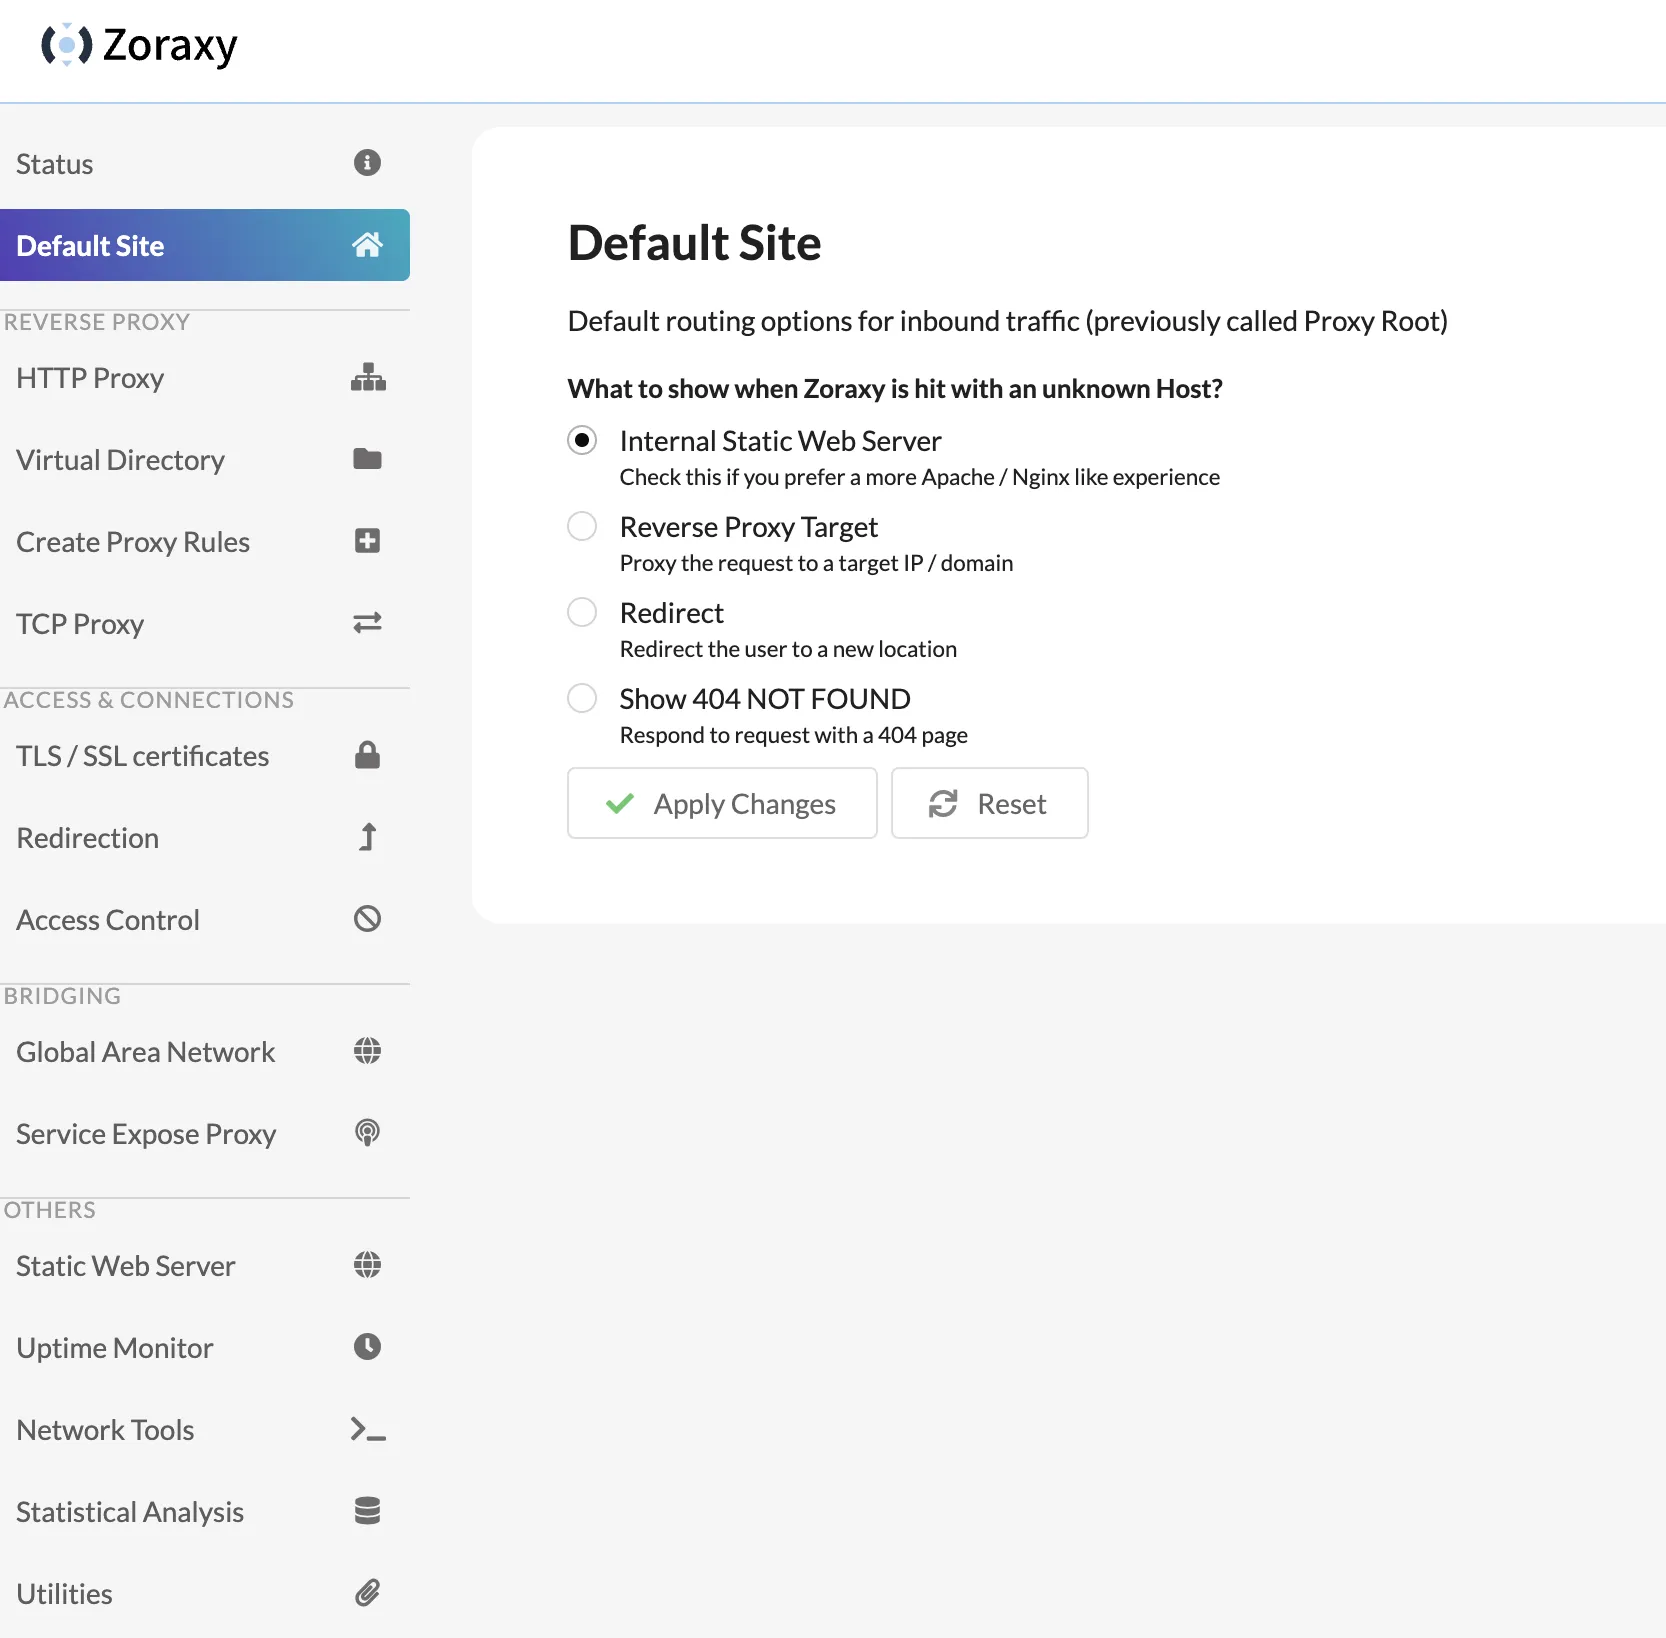
Static page can be found in Static Web Server.
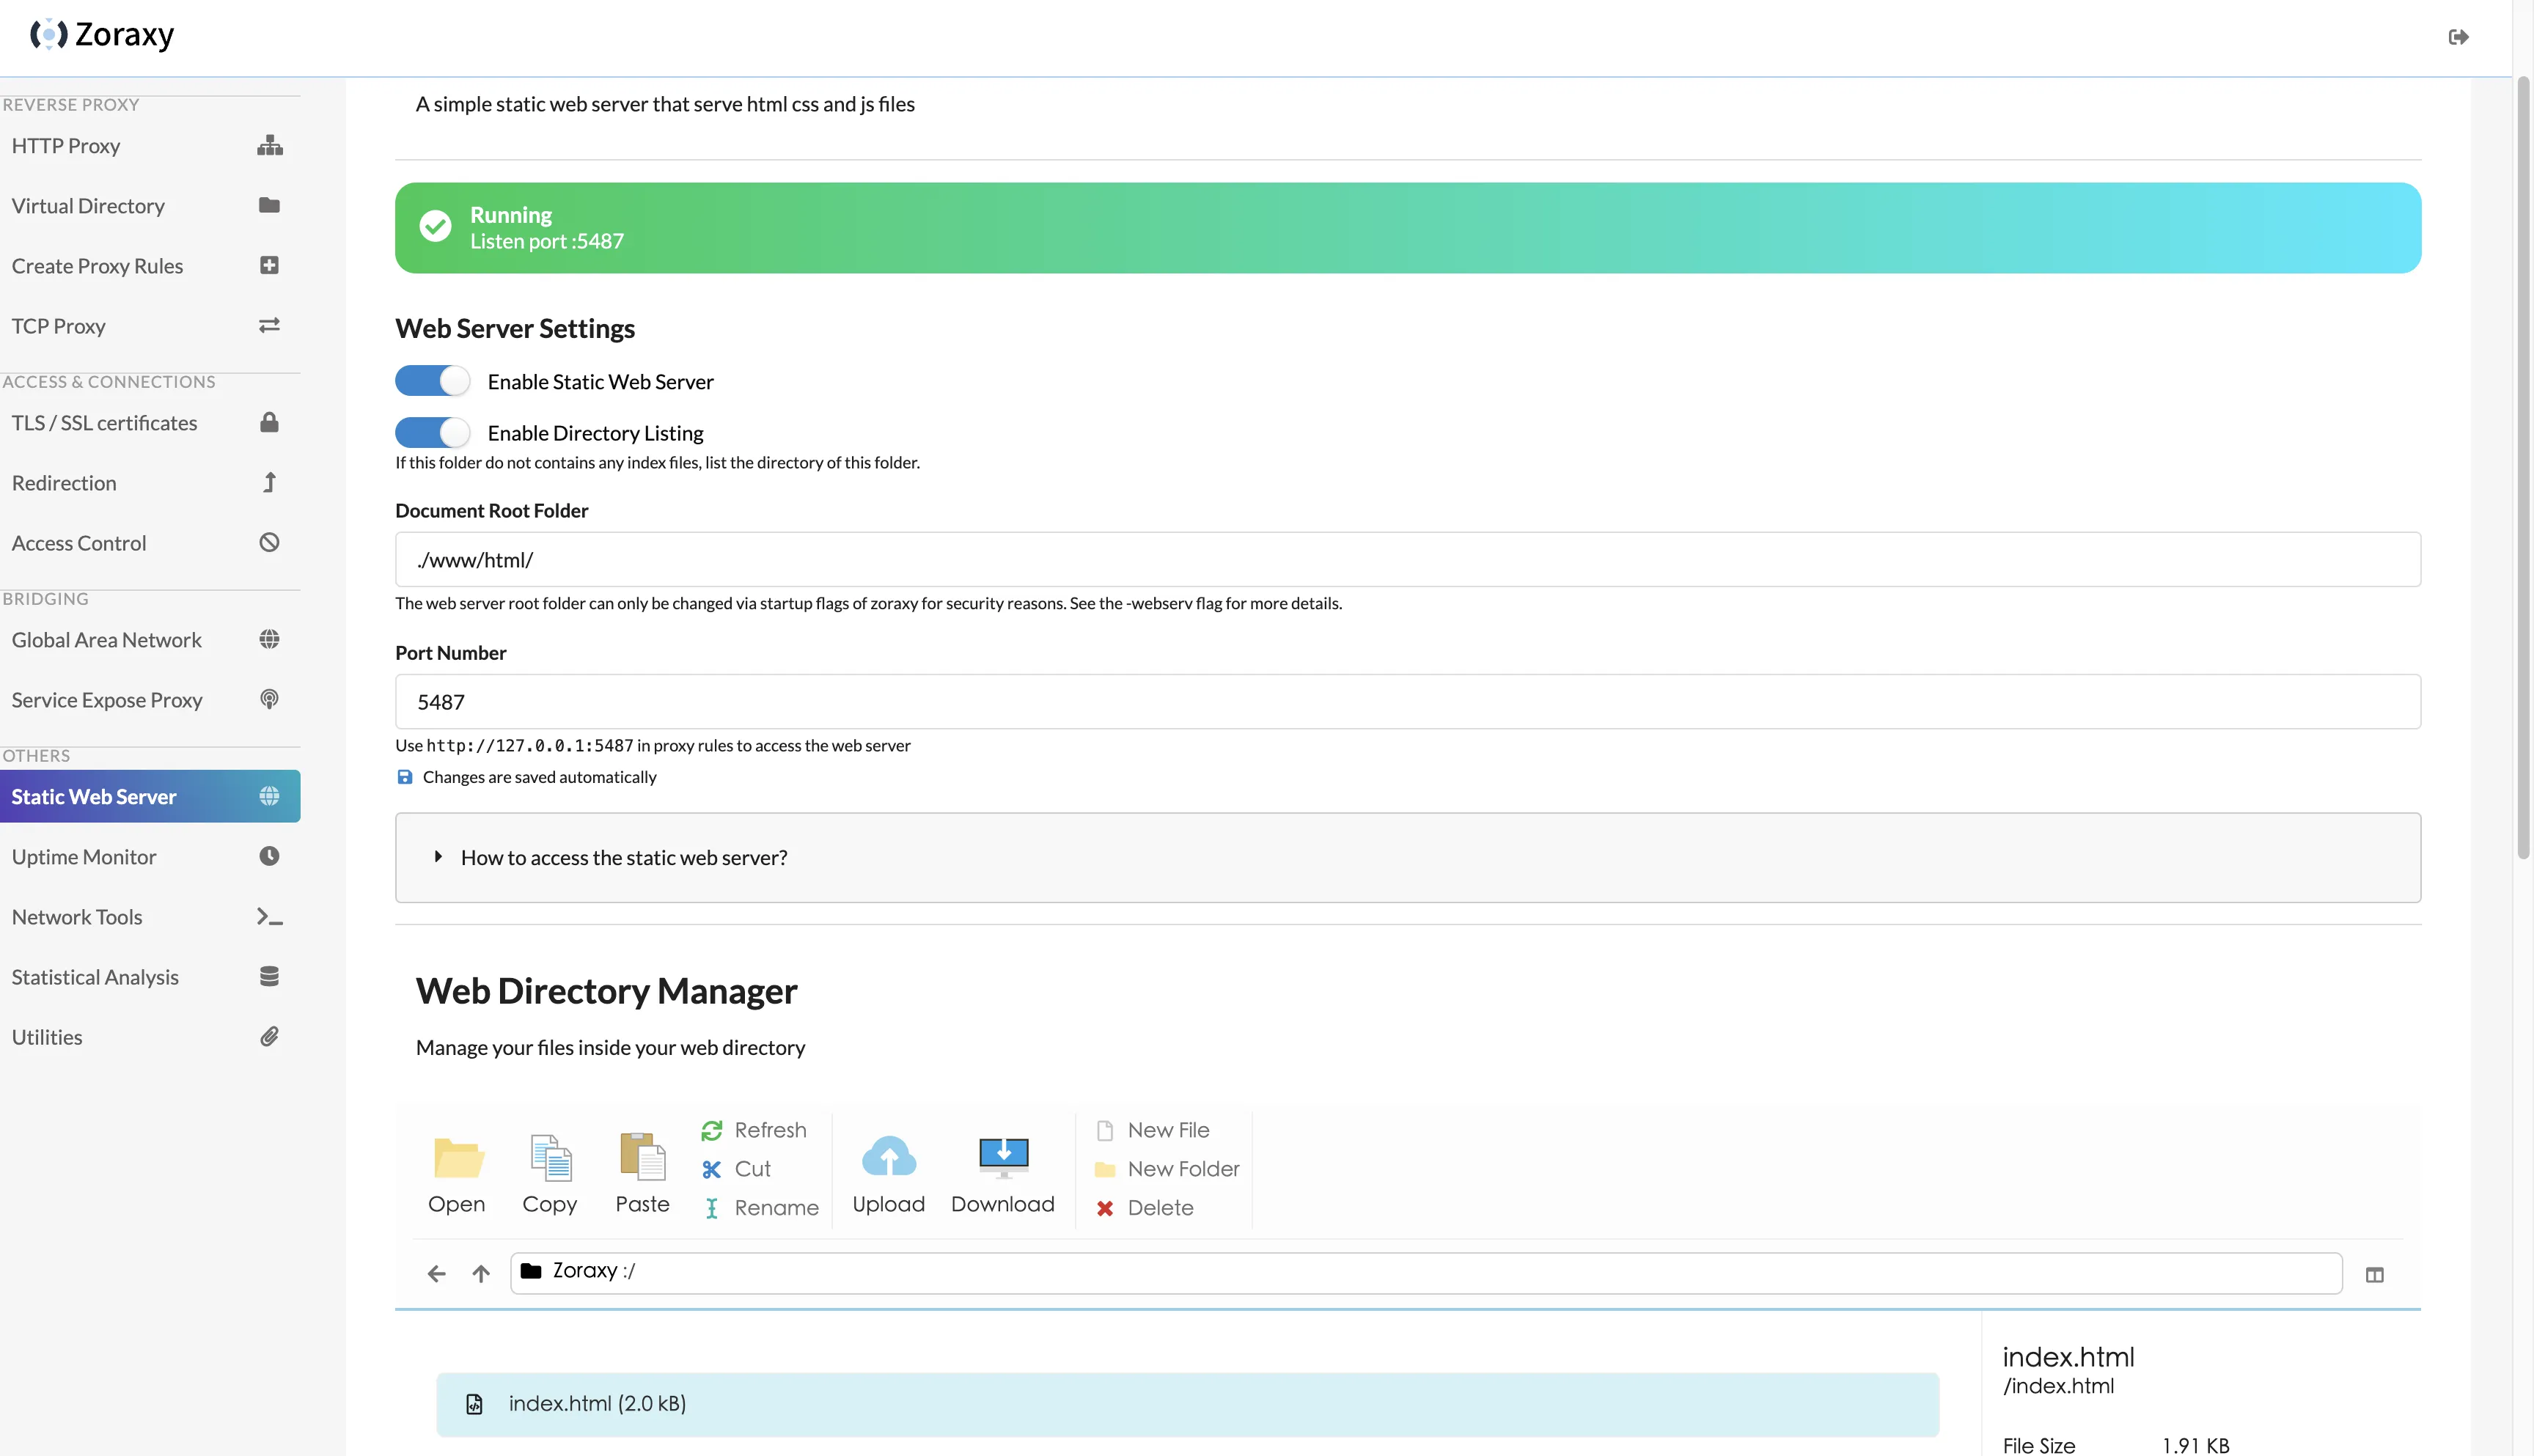
Default static page looks like this:

Next configure domain access for zoraxy backend. Using domain zoraxy.example.com as example.
First go to cloudflare’s DNS records for domain example.com, add an A record with name zoraxy and value as zoraxy server’s IP address.
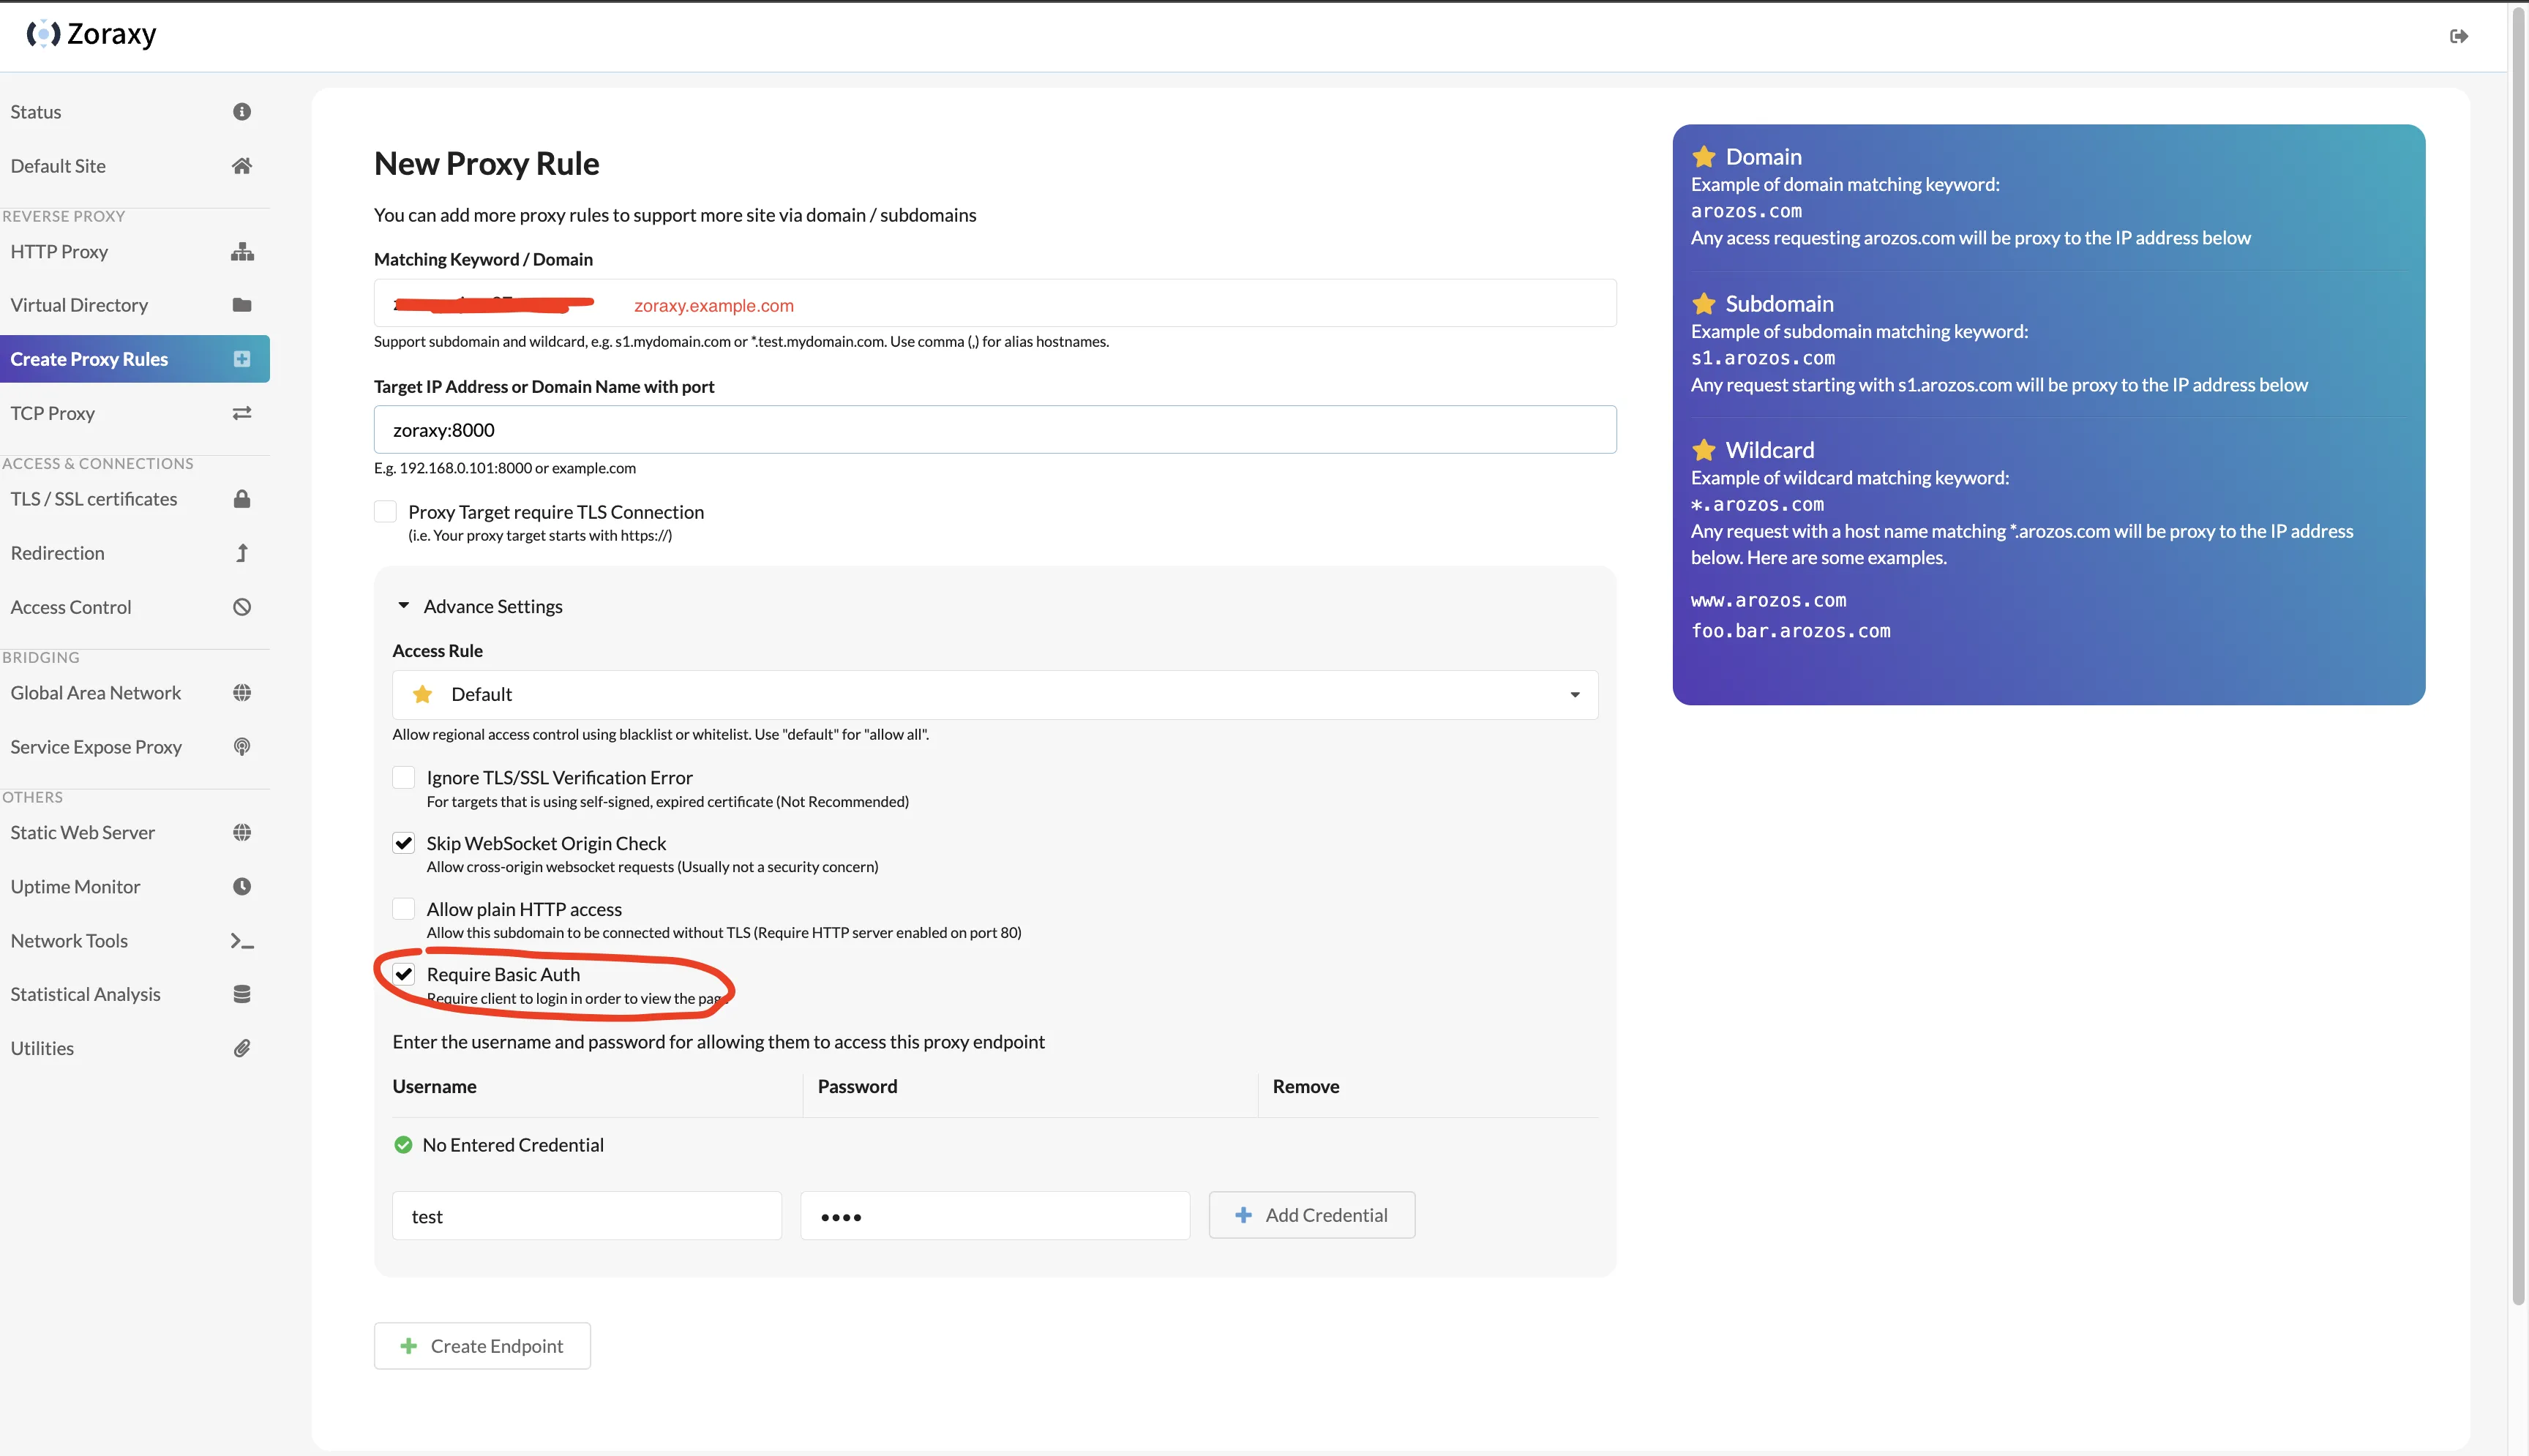
Then return to zoraxy backend’s Create Proxy Rules page.
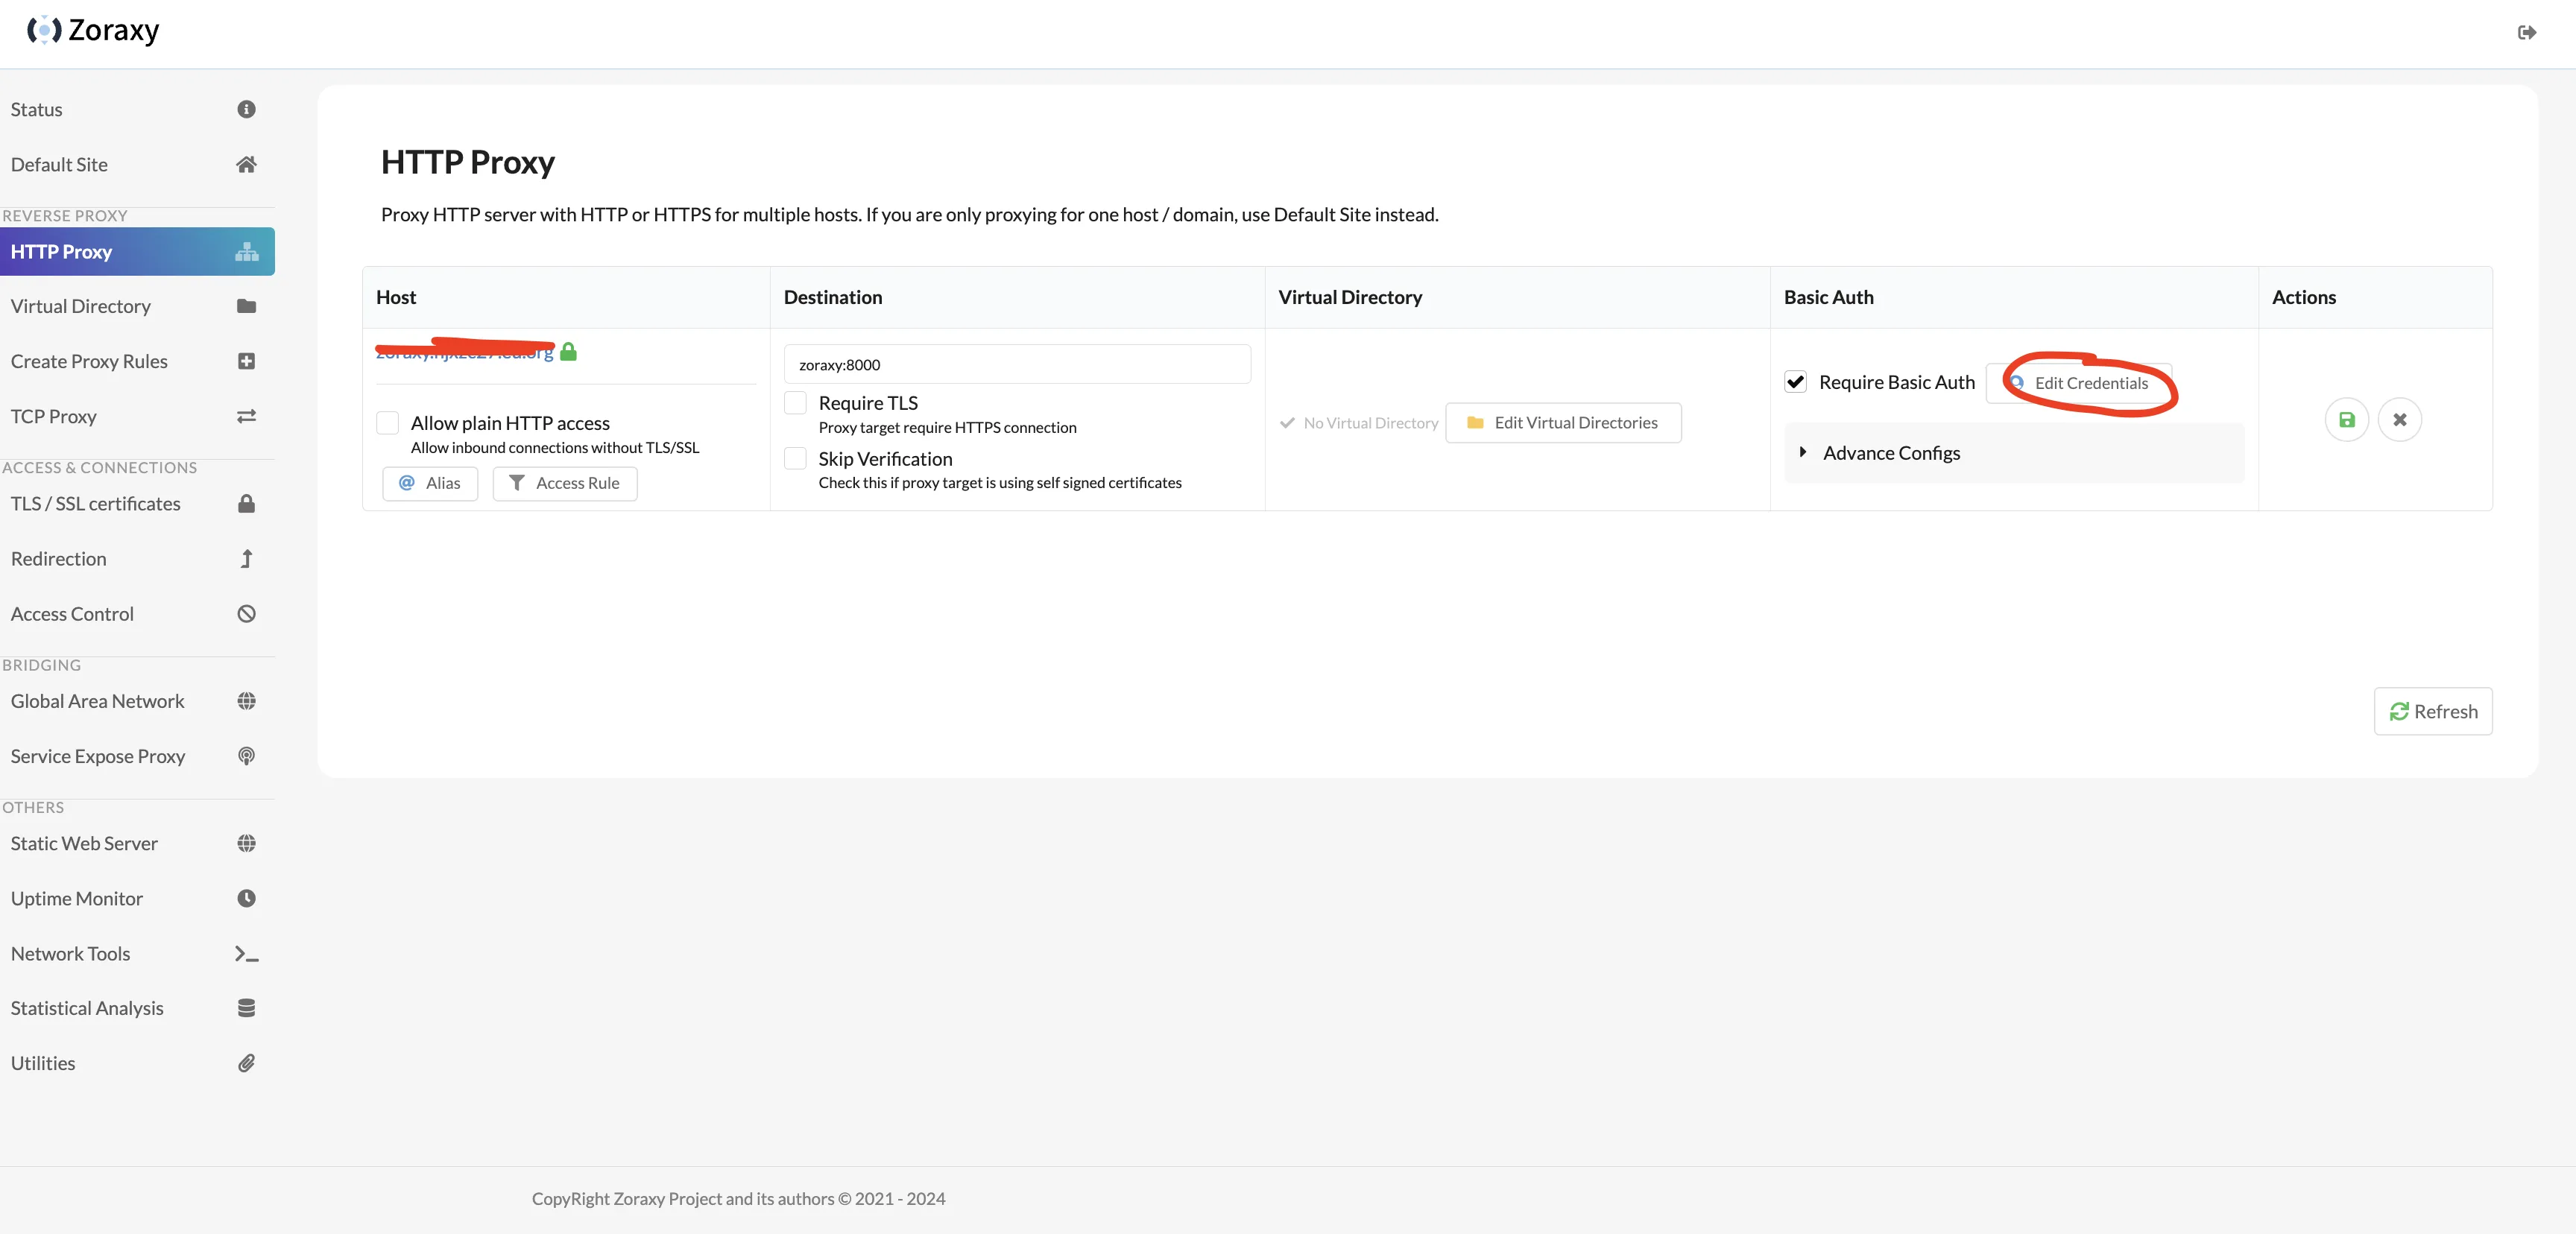
Matching Keyword / Domain: fill in zoraxy.example.com;
Target IP Address or Domain Name with port: fill in zoraxy:8000;
Check Require Basic Auth, enter basic auth username and password.
Click Create Endpoint.
Then go to TLS/SSL certificates page.
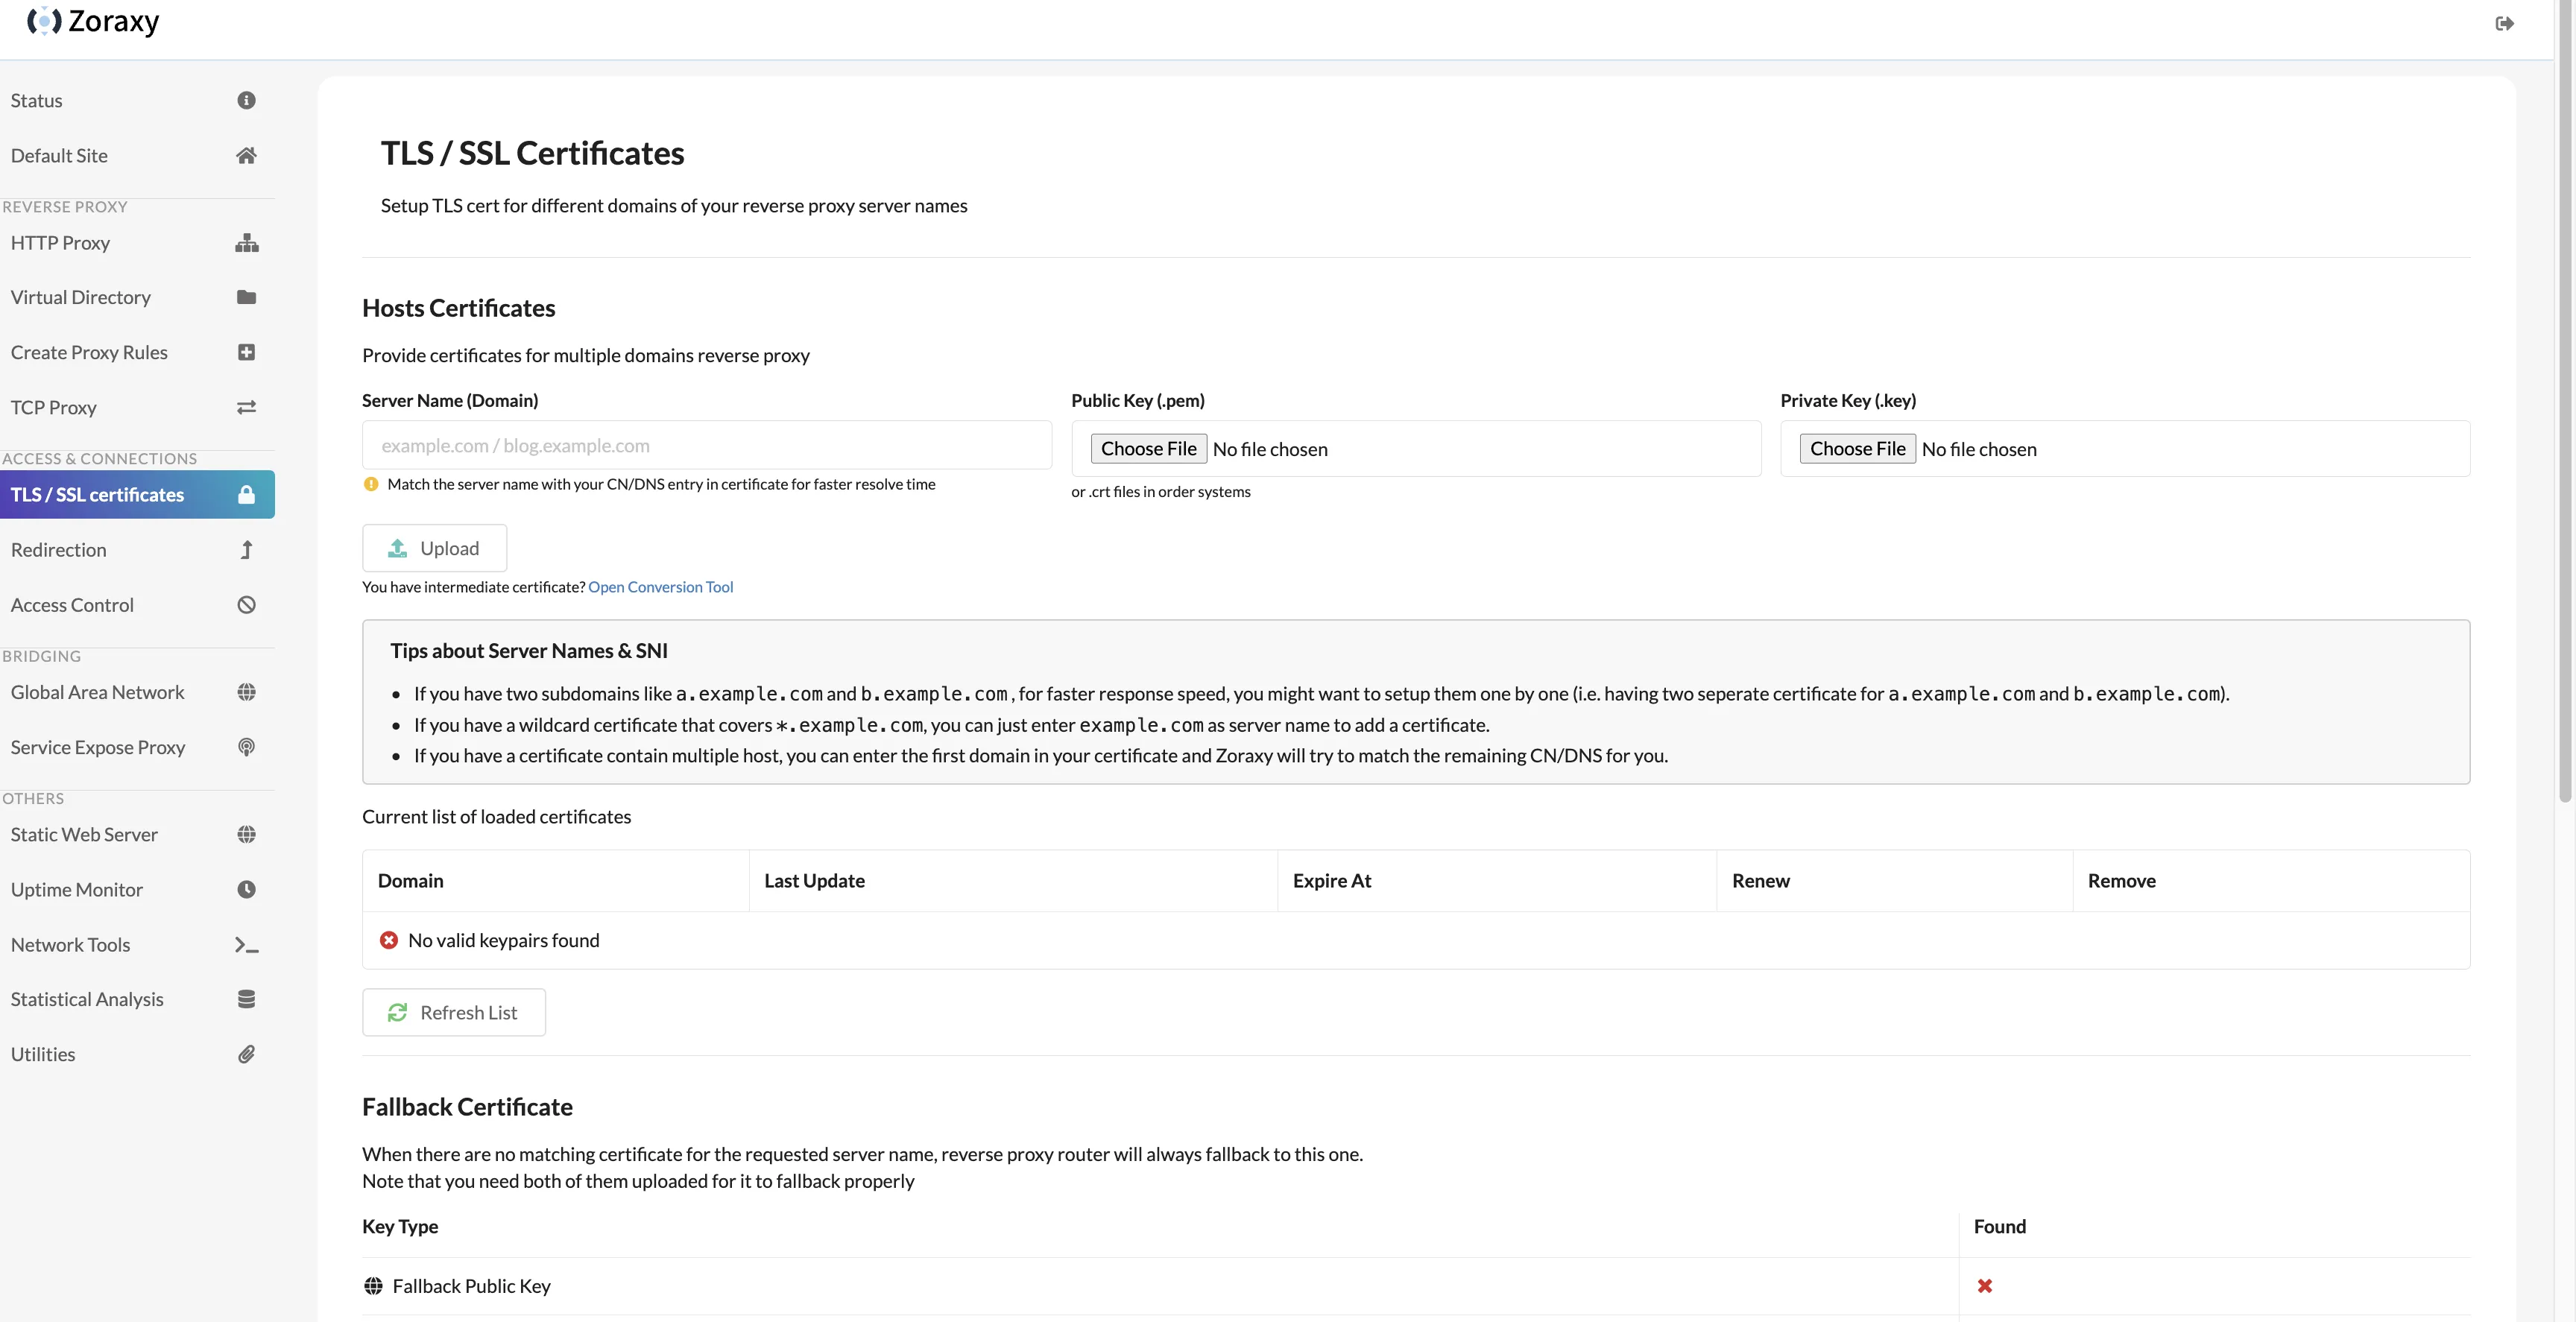
Scroll to bottom, fill ACME Email with your common email. Click Save Settings.

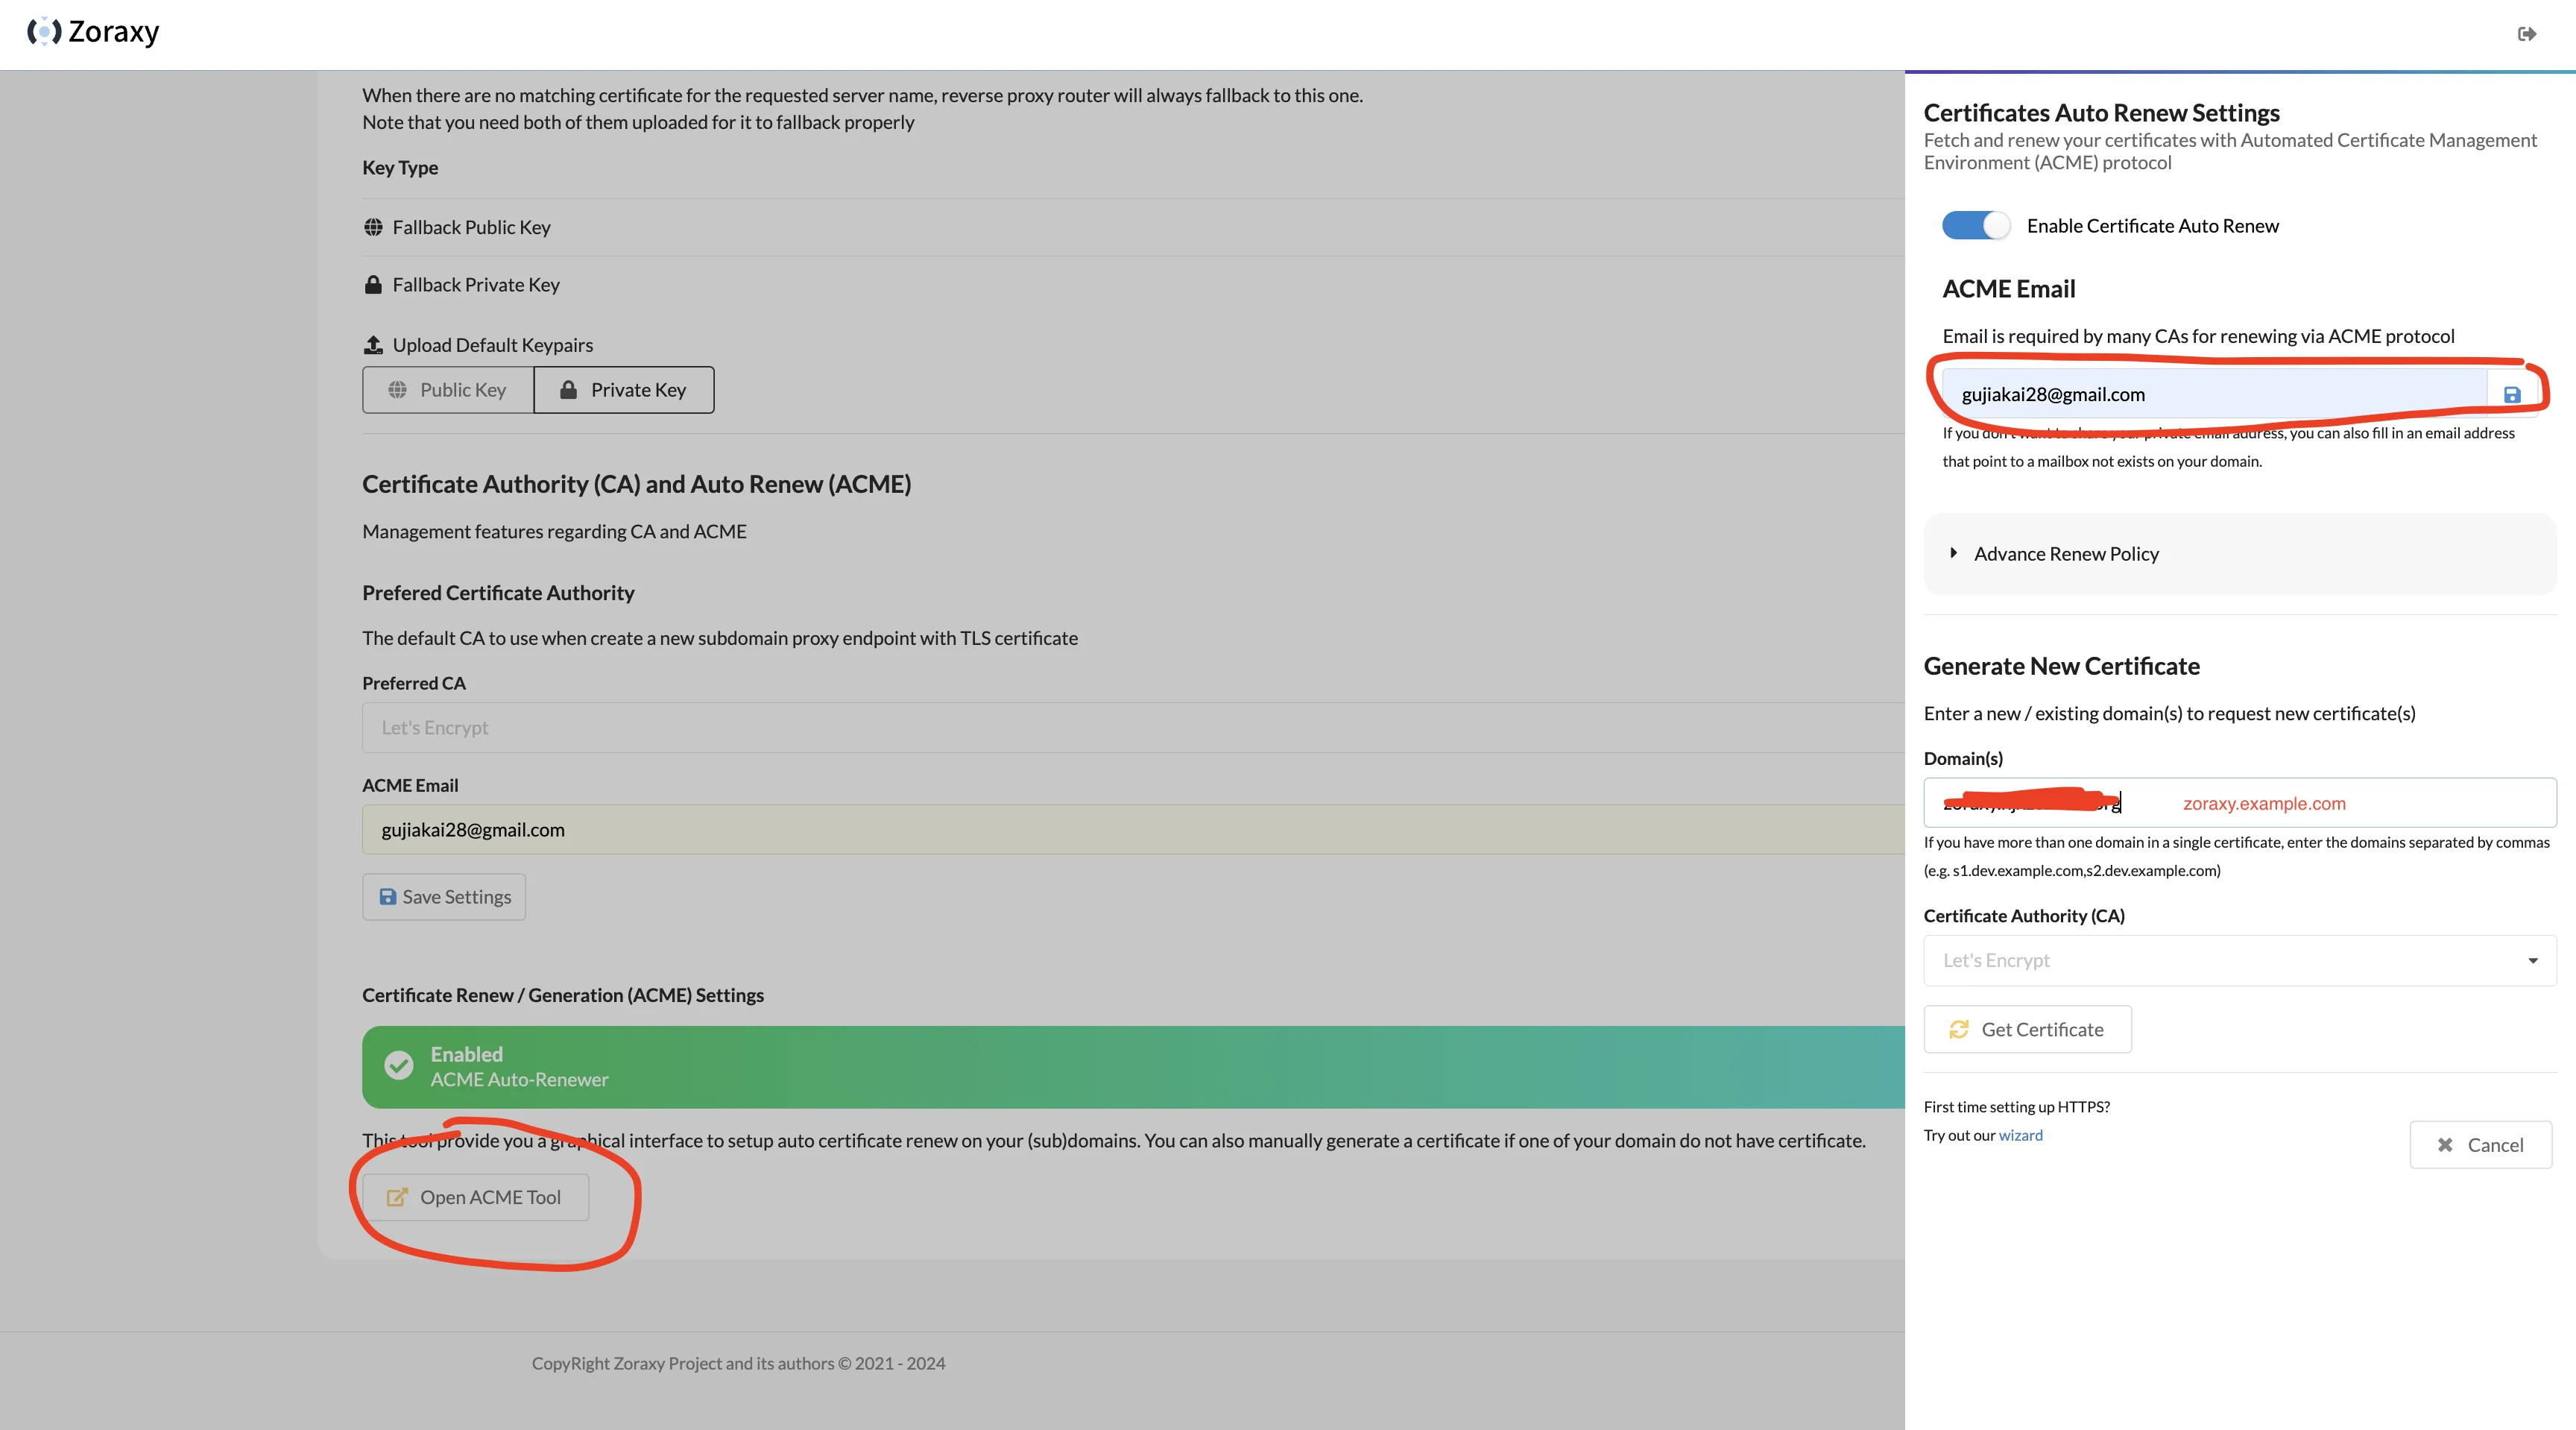
Then click Open Acme Tool at bottom, fill ACME Email with your common email, enable Certificate Auto Renew toggle. In Generate New Certificate’s Domain(s) input, fill zoraxy.example.com, click Get Certificate.
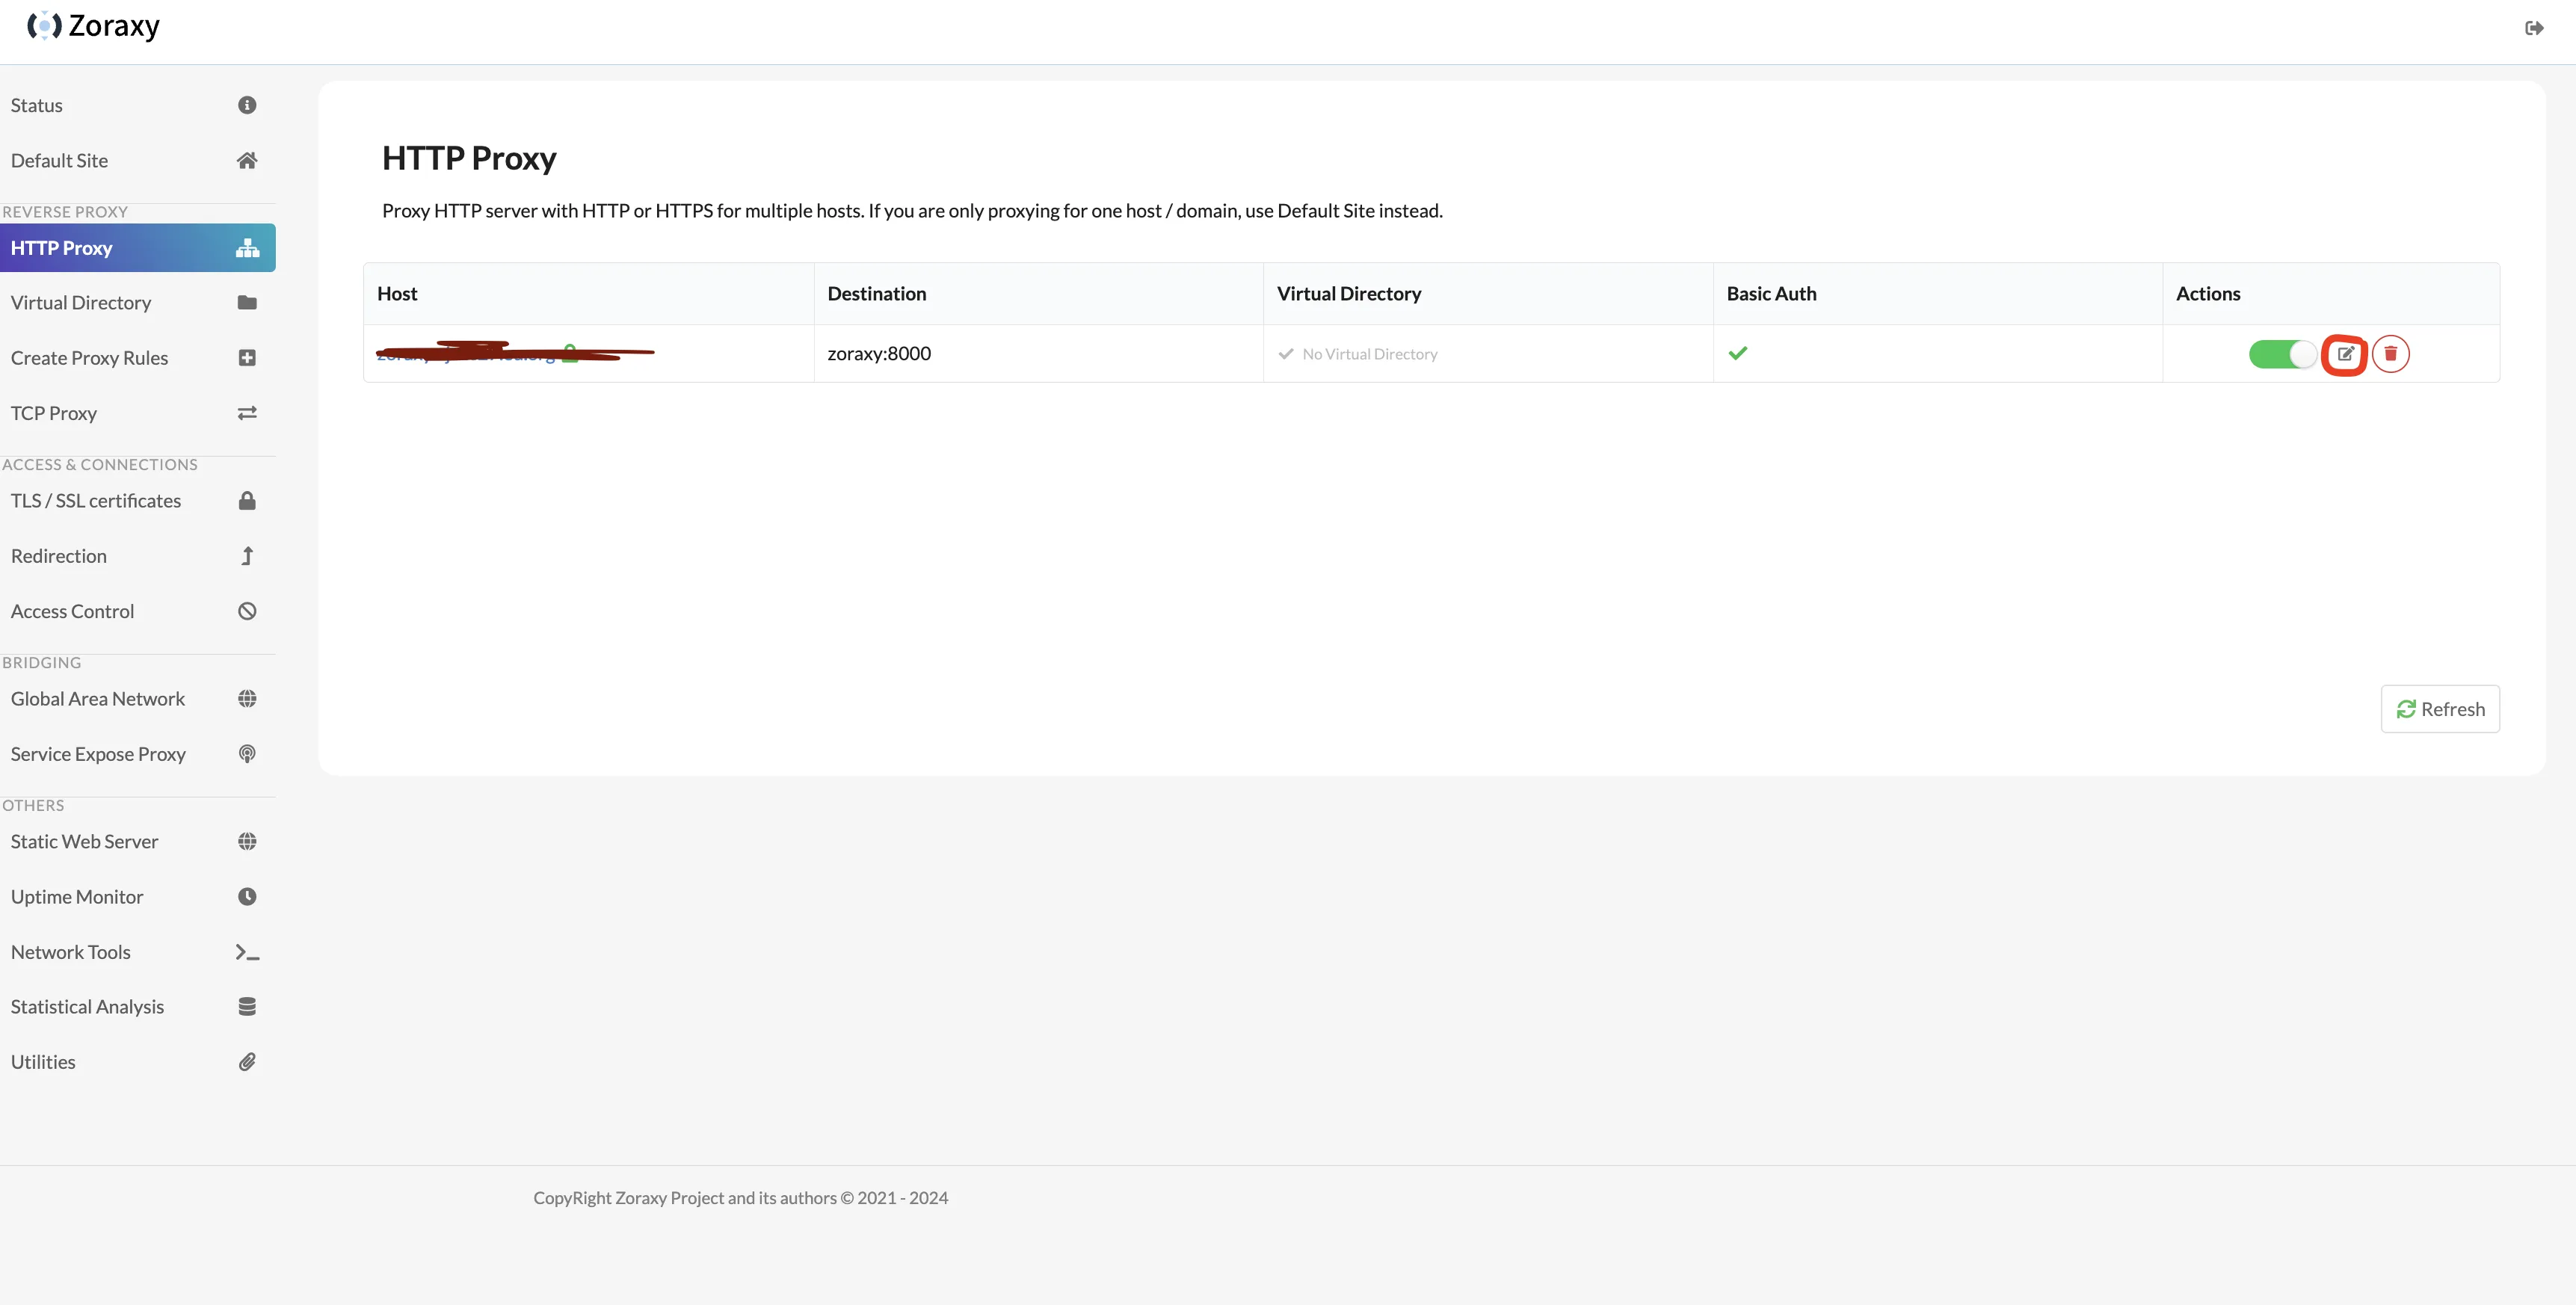
Open HTTP Proxy page, click zoraxy.example.com to access zoraxy backend via domain.
Enter basic auth credentials to pass verification.
If basic auth doesn’t work, go to HTTP Proxy page and edit the proxy rule just created.
Click Basic Auth’s Edit Credentials, add username and password in Basic Auth Credential.
After passing basic auth, you can access zoraxy backend via domain.
For security, minimize exposed ports. Modify zoraxy’s compose.yml file, remove the 8005:8000/tcp port mapping, then use docker compose down && docker compose up -d to redeploy zoraxy container.
Brief list of other pages:
-
Virtual Directory provides path mapping and other functions—explore on your own.
-
TCP Proxy has some relay flavor—haven’t used it yet.
-
Redirection Rules for adding redirect rules.
-
Access Control for access control, provides useful features like country blacklist. If you have such needs, I recommend setting up corresponding WAF rules in Cloudflare instead.
-
Global Area Network—haven’t used yet.
-
Service Expose Proxy—feature still in development.
-
Uptime Monitor—check reverse proxy target uptime.
-
Network Tools—provides common network tools like domain whois lookup.
-
Statistical Analysis—displays website access statistics.
-
Utilities—provides password change, toolbox, and other functions.
1.4. Providing Reverse Proxy for Other Services
Using recently seen dashboard project—glance—as example.
Official docker compose file:
|
|
Can be modified to:
|
|
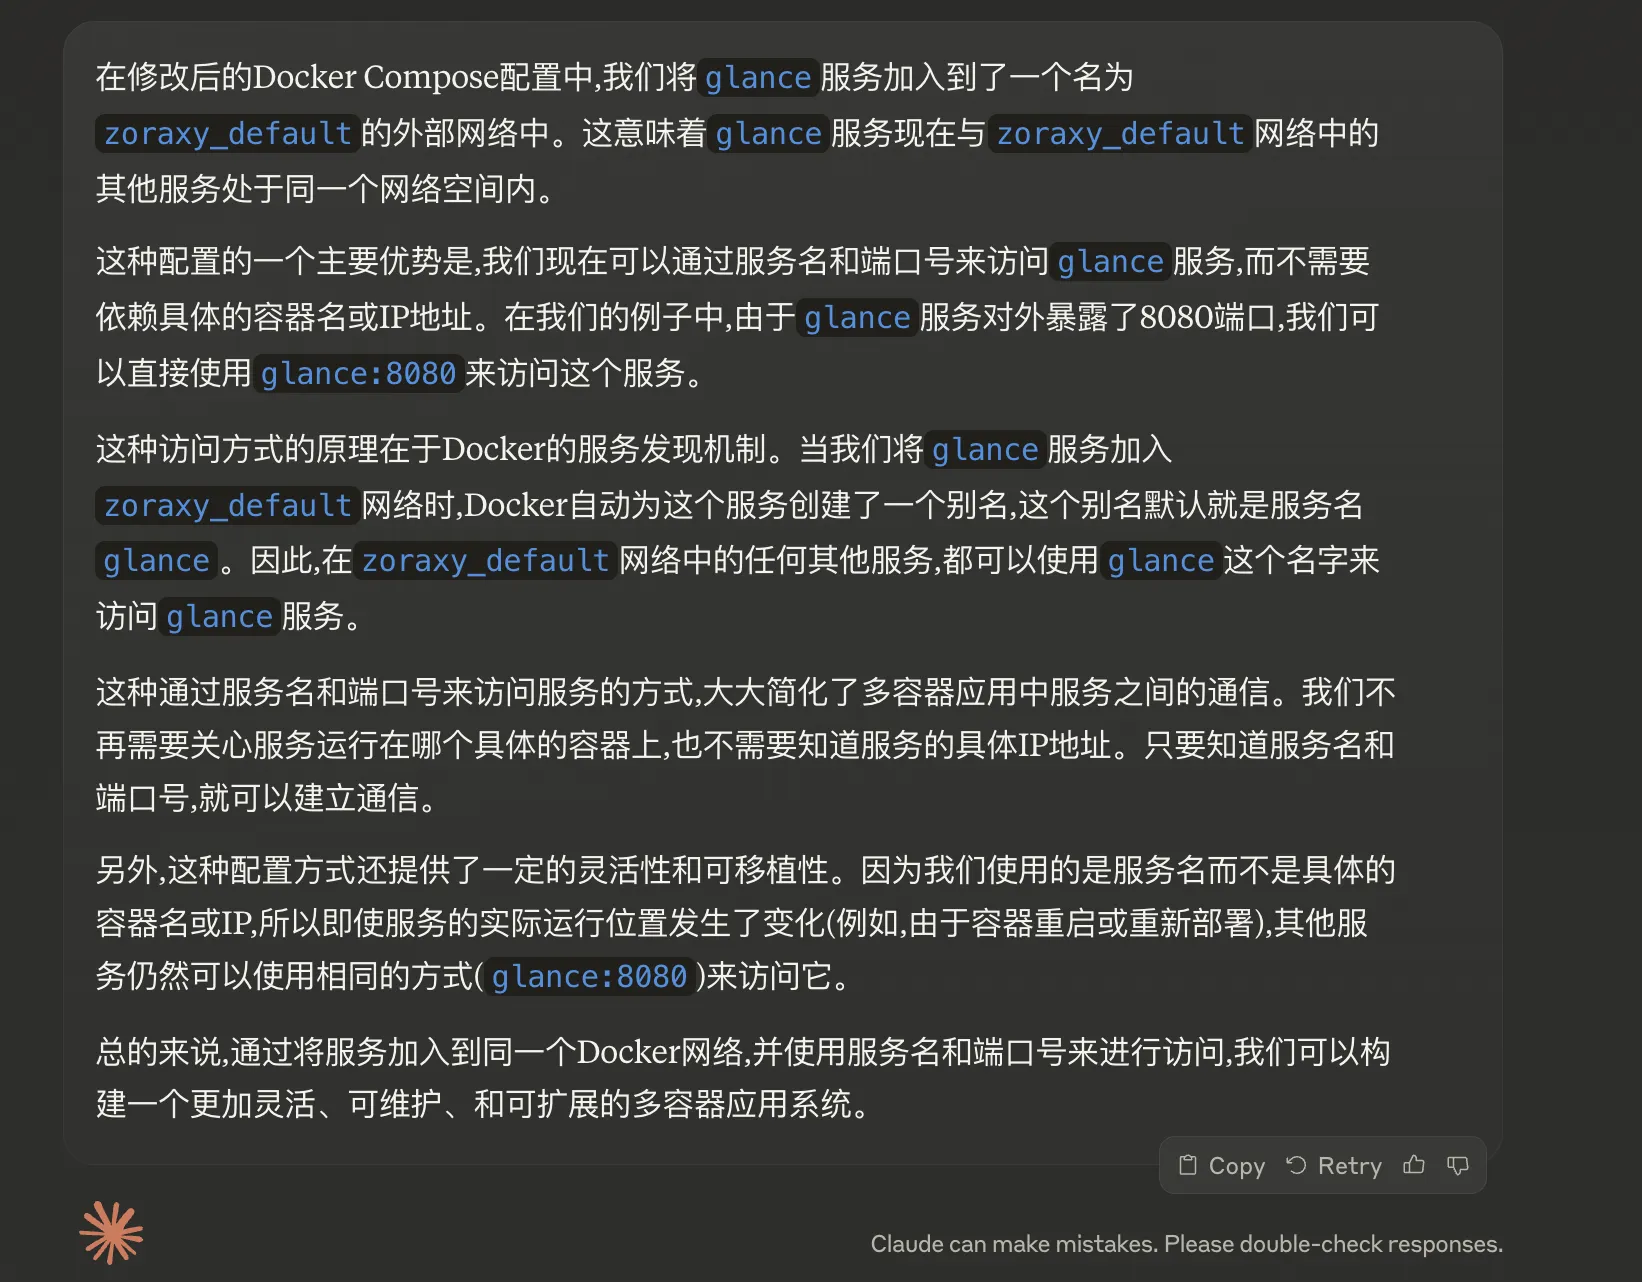
Add glance service to zoraxy_default external network so zoraxy can reach glance service via glance:8080. Detailed explanation from Claude3. Note: zoraxy_default network is created by zoraxy by default—check via docker network ls.
Can reference nginx proxy manager’s Best Practice: Use a Docker network for comparison learning.
Then create glance.yml file in the same directory as glance’s compose.yml. Specific configuration see Preconfigured page.
Directory structure looks like:

In glance folder execute docker compose up -d to start and run container in background.
Following operations same as creating proxy rules before.
-
First add an A record in Cloudflare domain DNS records, name
glance, valueexample.com. -
Then go to zoraxy backend’s Create Proxy Rules page. Matching Keyword / Domain: fill
glance.example.com; Target IP Address or Domain Name with port: fillglance:8080; click Create Endpoint to complete proxy rule creation. -
A popup appears at bottom right for SSL certificate request—click to request directly.
-
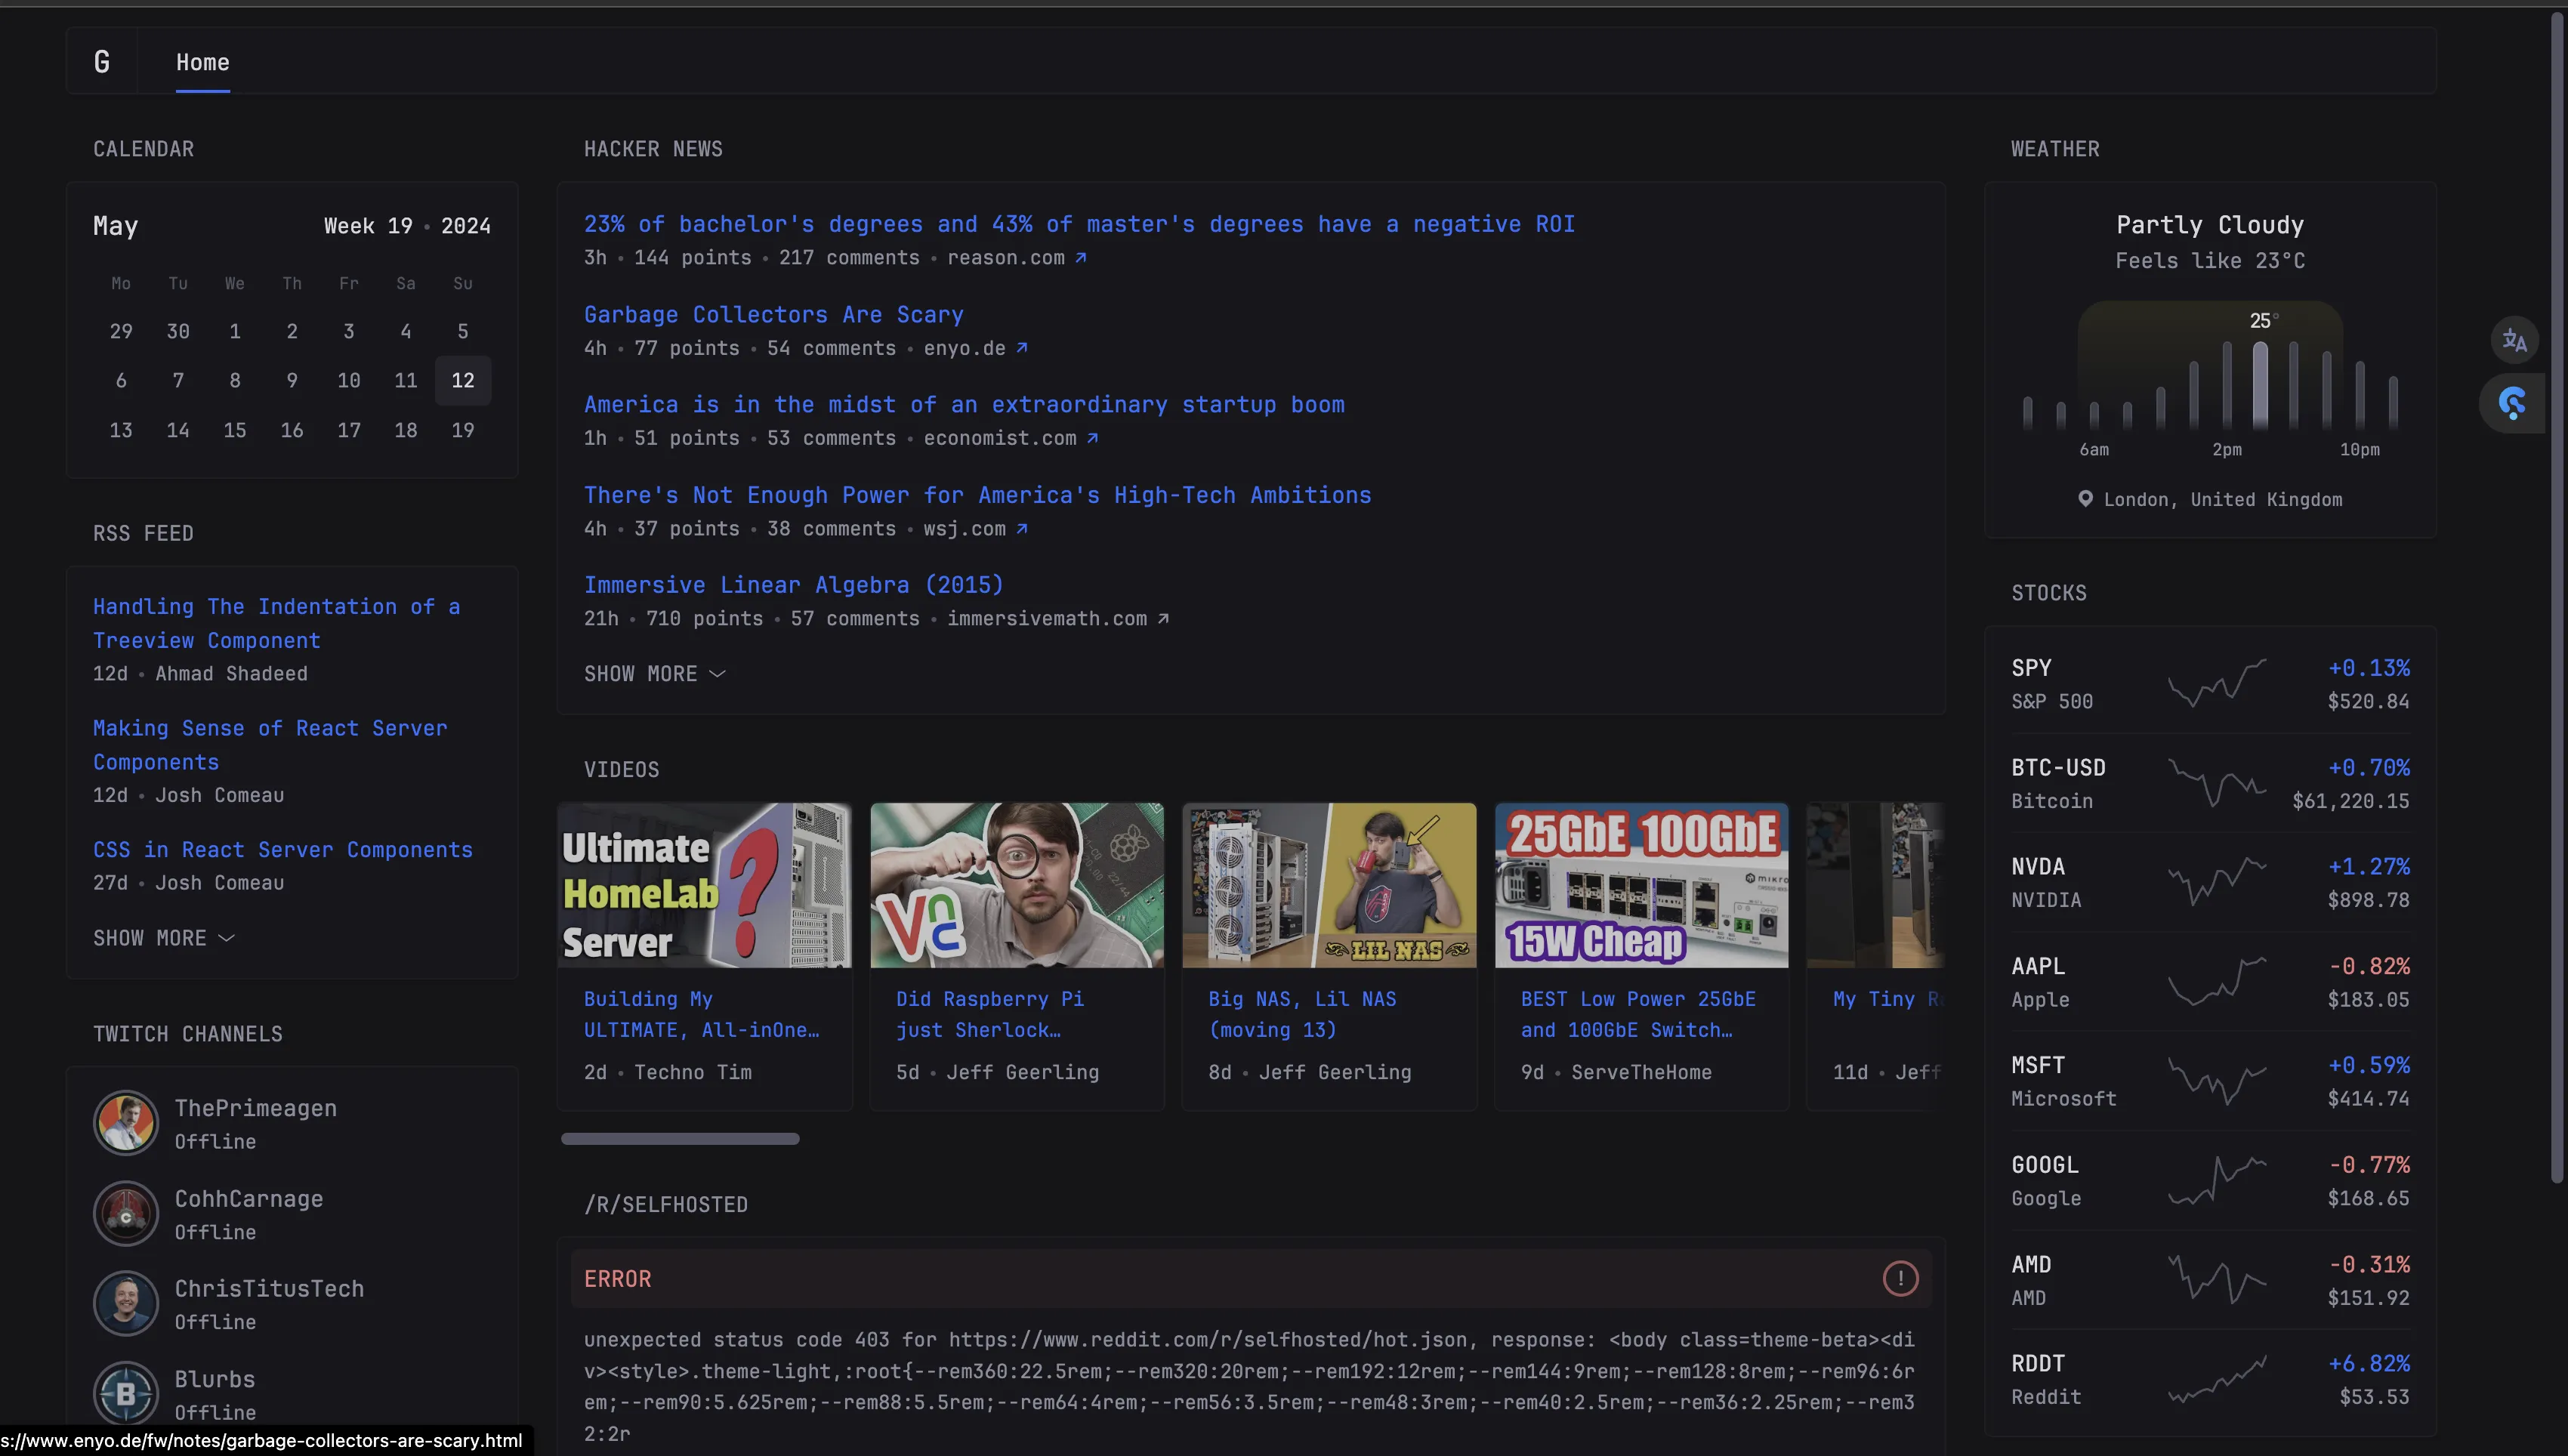
After request completes, visit
glance.example.comto successfully access glance service. To customize glance dashboard, modify glance.yml file then executedocker compose down && docker compose up -dto redeploy glance.
2. Summary
Zoraxy reverse proxy basically meets docker service reverse proxy needs, similar to nginx proxy manager. If you have a VPS without reverse proxy installed, give it a try.
Of course among reverse proxies I’ve used, the simplest and most convenient is still Caddy—auto HTTPS + simple configuration. Those who’ve used Caddy all say it’s good.
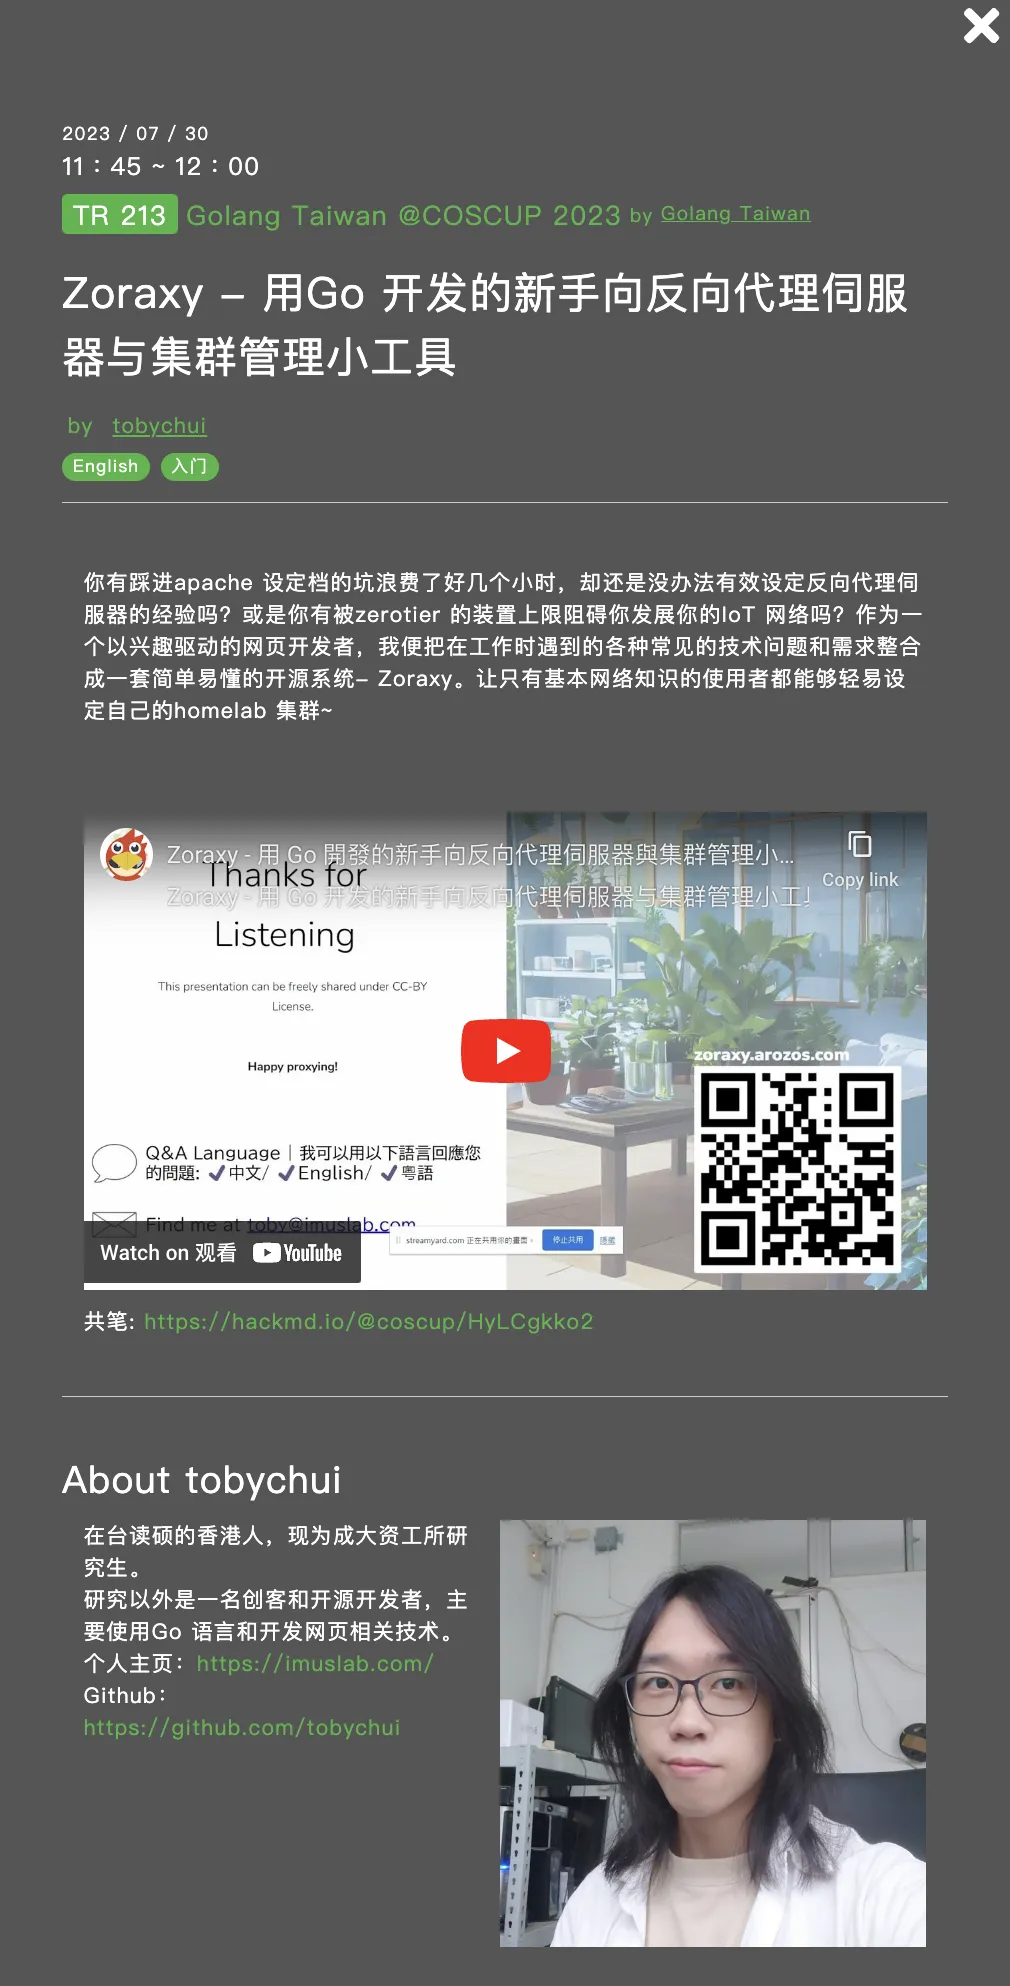
Finally attaching the zoraxy author’s introduction of their project—hear about the author’s usage approach.
Author’s video sharing on coscup platform
Today’s experiment machine for this blog post is from techvm, a Chinese one-man operation. I saw techvm’s owner had unclear dealings with recently absconded Tu’an Cloud, so last night I migrated all services from techvm’s big server to rackerd’s Black Friday machine. After finishing blog demo tonight, letting this monthly server expire naturally.
Although 4 cores, 12GB RAM, 50GB disk, 9929 routing at 35 RMB/month VPS looks tempting, after Tu’an Cloud’s incident I no longer trust Chinese one-man operations—nor foreign one-man operations. Buy VPS from reputable vendors and big providers.
I originally had Tu’an Cloud’s West Coast 133 package + New Year 299 package. Fortunately on May 11th I received partial refunds for both packages. Plus no important data on Tu’an Cloud machines—this experience serves as a wake-up call. Be a rational VPS enthusiast—staying away from one-man operations is the right path!
Document Info
- License: Free to share - Non-commercial - No derivatives - Attribution required (CC BY-NC-ND 4.0)